
My little boy turned TWO last week! To celebrate, we threw him a Sesame Street themed birthday party over the weekend. Since our house is totally not unpacked or visitor ready, we had the party at a local burger place where the kids had a fenced in astro-turfed yard to run around and I just had to provide dessert and decor. It was a fun time and I am pretty happy with how the Elmo and Cookie Monster treats turned out.

For the Elmo cake, I bought the pan at Michael’s. I whipped up a batch of the same Martha Stewart white cake I use for my son’s smash cake for his 1st birthday and made buttercream frosting, which I tinted black for Elmo’s pupils and mouth, orange for his nose, and red for his furry face. I used a spatula to apply all the frosting except for the red. For the red face I used a star tip from my cake decorating kit but the great thing about it was that the imperfections in my decorating ability looked just fine because Elmo is supposed to appear fuzzy and loved!

Preparations for the Cookie Monster cupcakes started a day earlier with a batch of chocolate chip cookies. I just followed the recipe on the bag of chips and I tried to slightly overbake them because I wanted crisper cookies for Cookie’s mouth. The cupcakes were Martha Stewart’s chocolate chip cupcakes and I used another batch of the same buttercream, this time tinted blue for Cookie Monster’s furry face, again decorating the face with the star tip. For his eyes I used white Wilton melts from Michael’s. I bought one of those edible markers for the pupils but it didn’t work on the melt. I should have bought black icing but I didn’t and since it was after Michael’s closed for the night, and I already had completed an emergency supermarket run for more butter after a measuring mishap, I used leftover black frosting from Elmo’s mouth, piped on with a small round cake decorating tip. Don’t forget that Cookie’s eyes are supposed to be googly and uneven! I thought they looked better applied to the cupcake at a slight slant instead of flat.

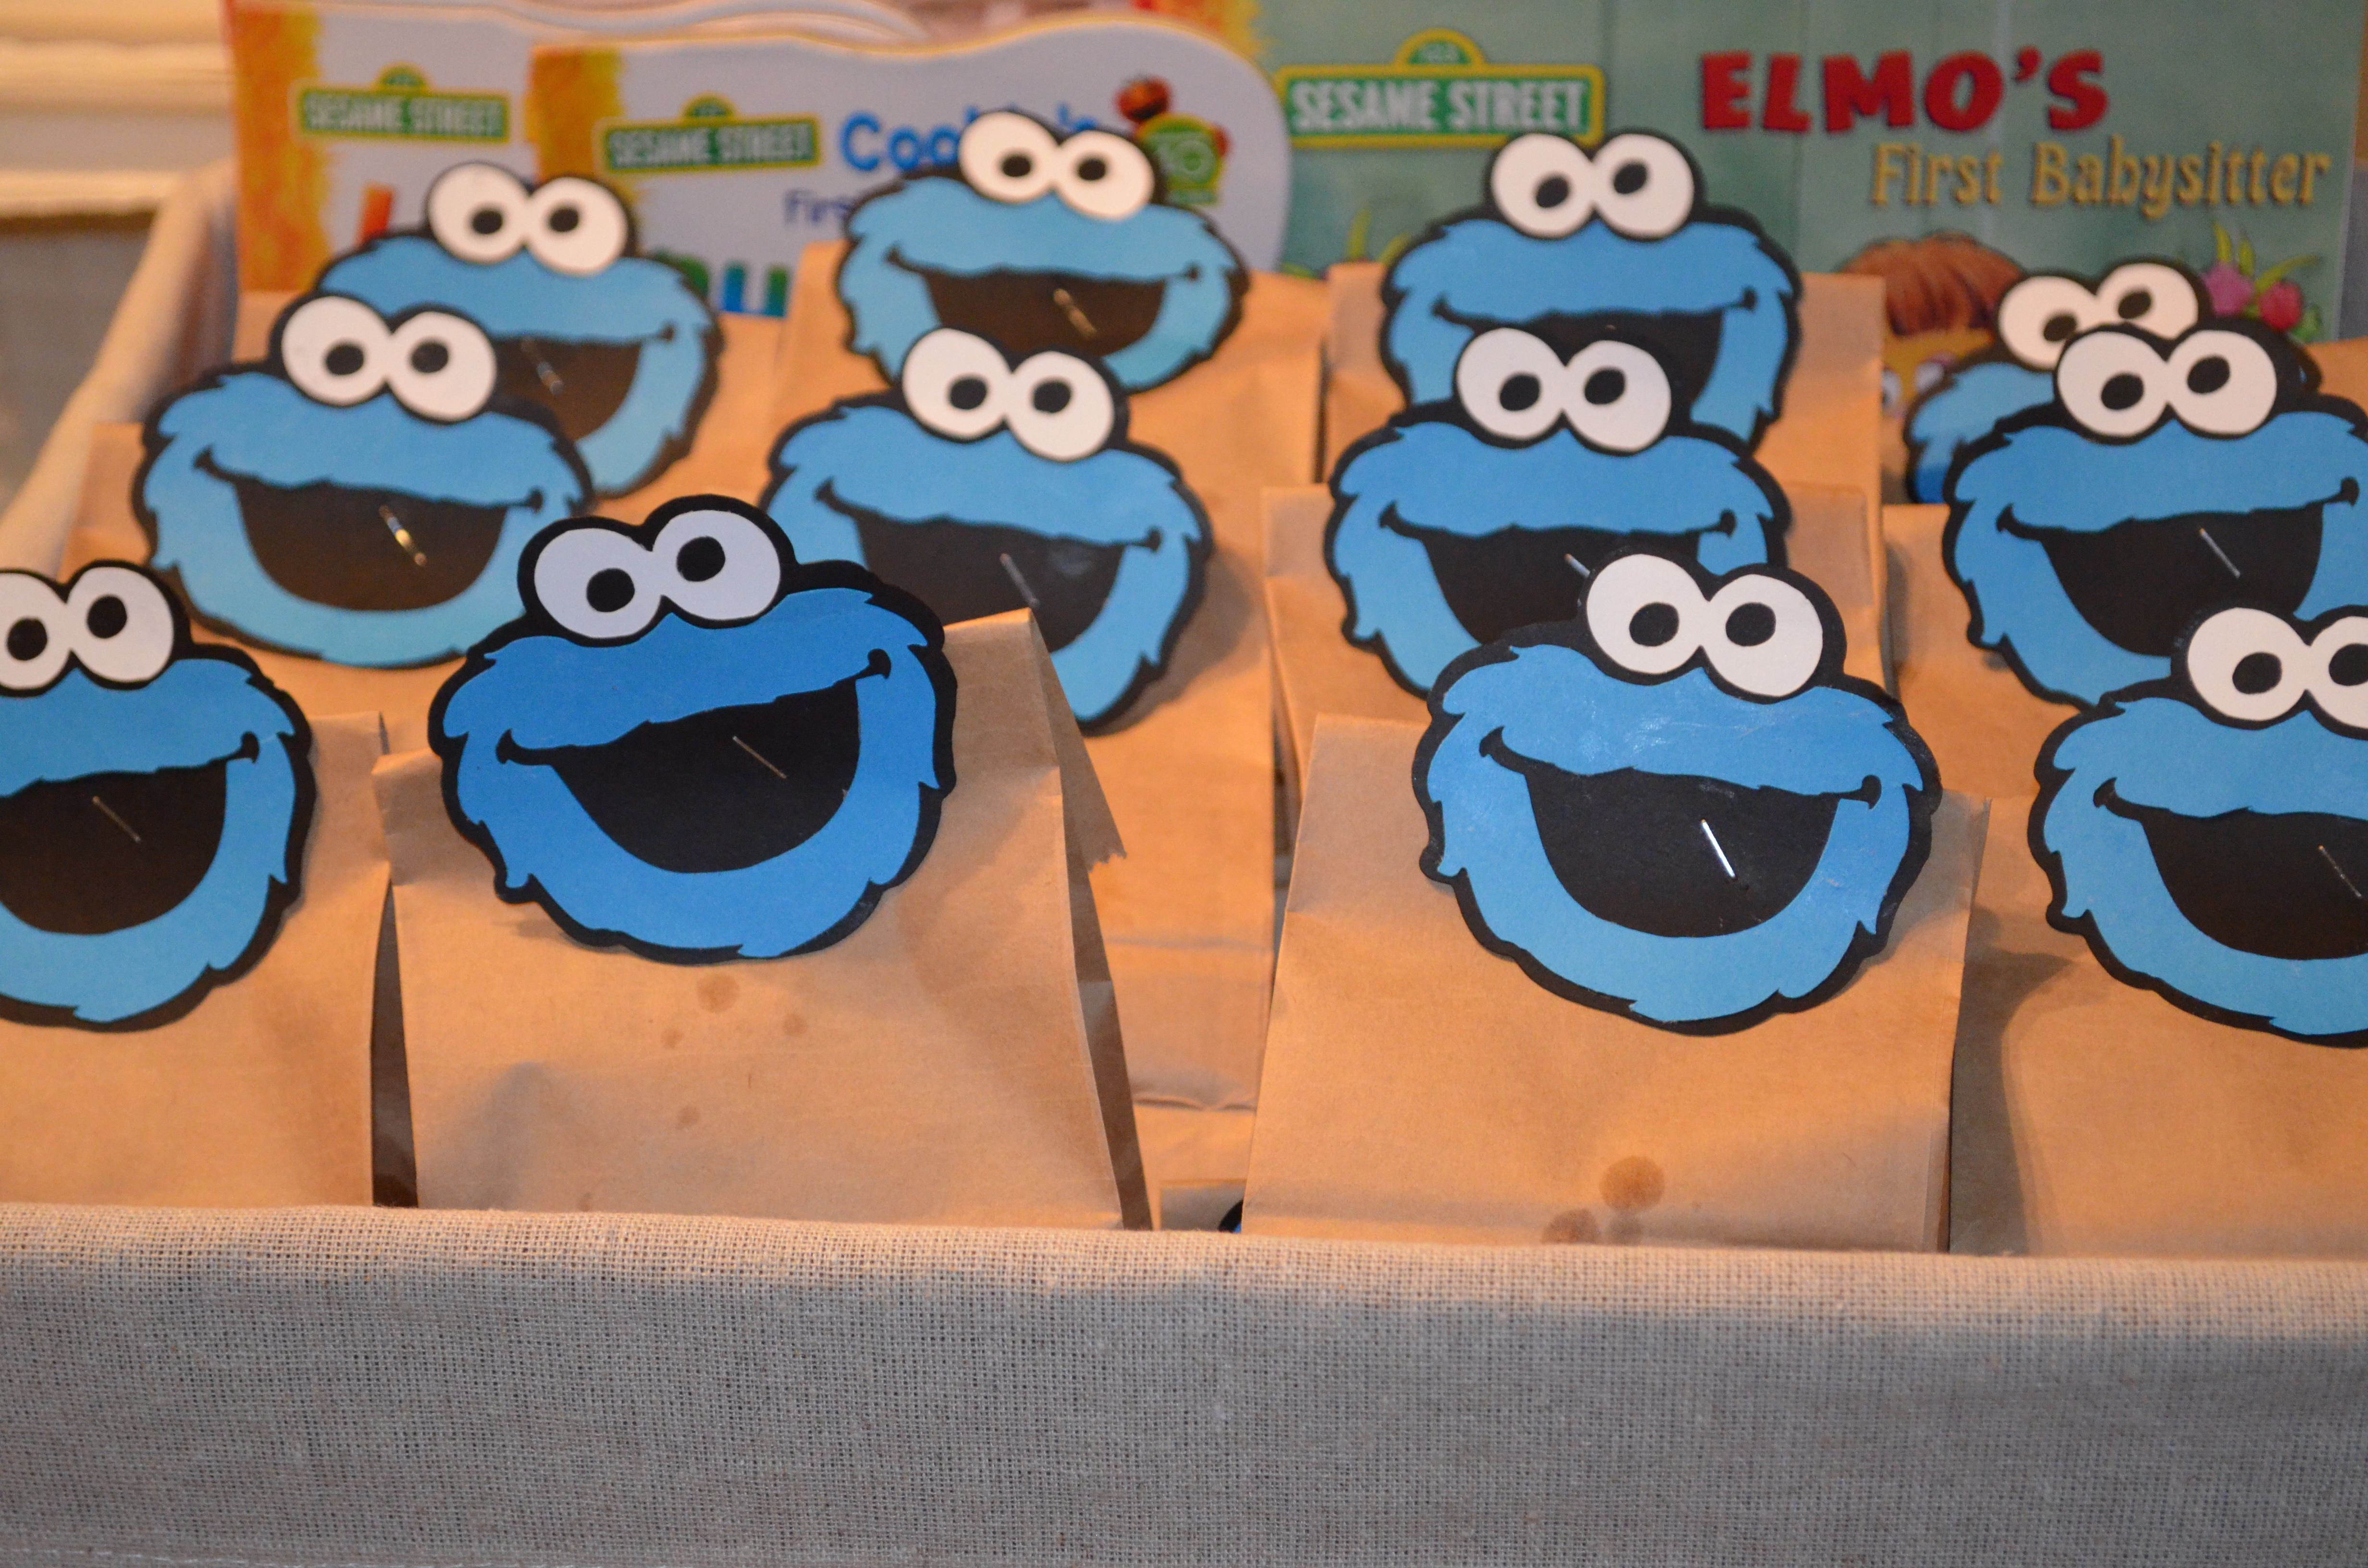
I didn’t get to do a ton of crafting for this party due to lack to time, but I’ll share the two things I did get to finish. First, I made a Cookie Monster holding a ‘2’ on the Cricut. Also, I made these cute little Cookie Monster faces with the Cricut (both from the Sesame Street fonts digital set) which I attached to a sack of cookies. I baked chocolate chip cookies, snickerdoodles, and honey cookies (recipe to follow soon) to fill up these favors. We also had Sesame Street books for the younger kids.

By the way, the white cake batter for the Elmo cake works great in other forms as well. I baked it into one of those big cupcake molds (a double recipe) last year for my son’s 1st birthday and it would be great baked into regular cake pans as well. It is such an easy cake to throw together that you definitely don’t need a mix!

I found so many great Sesame Street party ideas on Pinterest, most of which will remain in my Pinterest folder unattempted, but I’ll be adding these pictures to the mix in the hopes I can help out other parents planning their child’s Sesame Street party. Hope these treats will bring “Sunny Days” and “sweep the clouds away.” Happy Birthday to my adorable son!
______________________________
Elmo Cake (adapted from Martha Stewart’s Cakes)
Yield: 1 Elmo cake (serves 12)
For the cake:
nonstick cooking spray (I used Baker’s Joy with flour)
1/2 cup (1 stick) softened unsalted butter
2 cups all-purpose flour
1 1/2 cups granulated sugar
3 eggs
1 tablespoon baking powder
1/2 teaspoon salt
1 cup skim milk
1 teaspoon vanilla extract
For the frosting:
1 1/2 cups (3 sticks) softened unsalted butter
1 pound (4 cups) confectioners’ sugar
1/2 teaspoon vanilla extract
Wilton Icing Colors in No-Taste Red, Orange, and Black
light corn syrup (optional)
Directions:
1. Preheat the oven to 350F. Coat the Elmo pan with nonstick spray (either one that includes flour or dust with flour).
2. Beat the butter and sugar together in the bowl of an electric mixer, then add the eggs and beat until combined. Add the flour, baking powder, and salt and beat until just combined. Then add the milk and vanilla and beat until smooth and homogenous.
3. Pour the batter until the Elmo pan and bake for approximately 35 minutes, until the cake is golden and a knife inserted into the center comes out clean. Let the cake cool in the pan for at least 20 minutes then carefully run a small spatula or knife around the edges, place a wire cooling rack against the cake and turn both the cooling rack and Elmo pan over. Carefully remove the pan. Now you’ll see Elmo’s face. Let the cake cool for at least 1 hour. Then carefully transfer to whatever dish you will be serving the cake on and slide 3 pieces of parchment under the edges to help with any frosting overflow while decorating.
4. Meanwhile, make the frosting by beating butter in the bowl of an electric mixer on medium-high speed until pale and creamy. Then reduce the speed to medium and slowly add in the confectioners’ sugar, a little at a time, increasing the speed to high for a few seconds every so often to help the frosting become light and airy. Then add the vanilla and beat until smooth.
5. Remove 1/2 cup of frosting from the bowl to a smaller bowl and add black tint until desired color is achieved. Then, if desired, add 1 1/2 teaspoons of corn syrup to help thin the frosting (also it helps make it glossy). Smooth the black frosting over Elmo’s mouth with an offset spatula (it’s okay to color out of the lines a little because you can cover it up with red frosting later). Make sure to save some black for Elmo’s eyes too.
6. Next frost his eyes with the white frosting, again smoothing it with the spatula. Make room for his pupils and pipe/smooth a circle of black frosting onto each eyeball.
7. For Elmo’s nose, set aside 1/4 cup of frosting and tint it orange until desired color is achieved. Then smooth the frosting onto his nose.
8. Finally, tint the remainder of the frosting red and thin, if desired, with 3/4 teaspoon light corn syrup. Either smooth it onto his face with a spatula or use a star tip (I used Wilton #21) to fill in the remaining unfrosted areas with red buttercream. Remove the parchment.
9. Make your child really happy!
______________________________
Cookie Monster Cupcakes (adapted from Martha Stewart’s Cupcakes)
Yield: 30 cupcakes
For the cupcakes:
3 1/4 cups plus 1 tablespoon cake flour, divided
4 1/2 teaspoons baking powder
1/4 teaspoon salt
1 tablespoon vanilla extract
1 cup plus 2 tablespoons skim milk
1/2 cup plus 6 tablespoons (1 3/4 sticks) softened unsalted butter
1 3/4 cups granulated sugar
5 large egg whites (I attempted to use the liquid egg whites first but they didn’t beat up nicely so I’d recommend using real eggs)
2 cups semi-sweet chocolate chips
For the decorations:
1 1/2 cups (3 sticks) softened unsalted butter
1 pound (4 cups) confectioners’ sugar
1/2 teaspoon vanilla extract
Wilton Icing Color in Royal Blue
Wilton Candy Melts (white)-1 bag
Black frosting (either leftover from Elmo cake or purchased separately. Alternately, set aside some of the frosting before tinting it blue and tint it black)
Chocolate chip cookie fragments (see recipe below)
Directions:
1. Preheat the oven to 350F. Line standard muffin tins with paper liners (blue if possible, for the ultimate Cookie Monster effect). Whisk together 3 1/4 cups cake flour, baking powder, and salt and set aside.
2. Cream butter in the bowl of an electric mixer on medium-high speed until smooth. Add the sugar and beat until pale and fluffy. Add the vanilla to the milk. Add the flour mixture in 3 batches, alternating with the milk mixture in 2 additions, beating after each addition. Set aside.
3. In another bowl, whisk the egg whites until stiff peaks form. Fold into the cake batter until just combined. Toss the chocolate chips with the remaining tablespoon of cake flour and gently fold into the cake batter.
4. Divide the batter among the cups, approximately 1/3 cup of batter in each. Bake for about 22 minutes, until a knife inserted into the center comes out clean and the tops of the cupcakes are springy to the touch. Let cool completely before frosting.
5. For the frosting, beat butter in the bowl of an electric mixer on medium-high speed until pale and creamy. Then reduce the speed to medium and slowly add in the confectioners’ sugar, a little at a time, increasing the speed to high for a few seconds every so often to help the frosting become light and airy. Then add the vanilla and beat until smooth. Finally, add the blue tint until you have achieved the desired hue. I had to hold a stuffed Cookie Monster up next to my mixing bowl until I got the color just right!
6. Once the cupcakes have cooled, either spread the frosting on top with an offset spatula or pipe on top with a star cake decorating tip (I used Wilton #21). Gently insert the Wilton candy melts in at an angle for his eyes. Pipe black frosting for the pupils (remember his eyes are uneven). Pop a piece of chocolate chip cookie in for his mouth and enjoy the cuteness!
_____________________________
Chocolate Chip Cookies
Yield: about 4 dozen cookies
3/4 cup (1 1/2 sticks) softened unsalted butter
1/2 cup granulated sugar
1 cup light brown sugar, packed
2 large eggs
1 tablespoon vanilla extract
1 teaspoon baking soda
1/2 teaspoon salt
2 cups all-purpose flour
2 cups semi-sweet chocolate chips
Directions:
1. Preheat the oven to 375F. Line cookie sheets with parchment paper or silicone mats (like Silpat).
2. In the bowl of an electric mixer, combine butter and the sugars and beat until smooth. Add eggs and vanilla and mix thoroughly. Add the dry ingredients and mix until fully incorporated. Add in the chocolate chips.
3. Drop by spoonfuls onto the cookie sheets. Bake for 12 minutes or until desired doneness. For Cookie Monster cookies, a little crispier is preferable.
4. Let cool on wire racks.
______________________________
Tagged: Birthday, Buttercream, Cake, Chocolate, Cookie Monster, Cookies, Cupcake, Elmo, kid friendly, Sesame Street

Leave a comment