Tag Archives: dairy free

Apple Basil Potato Kugel

CIC header

Next week marks the start of the Jewish year, Rosh Hashanah. Apples are a traditional part of the holiday because they represent a sweet start to the year (especially when dipped in honey) and hark back to the Garden of Eden. Kugels, which are a baked pudding or casserole, are a traditional Jewish food as well. In my family, we enjoy potato kugel at least one night of Rosh Hashanah. So when I was brainstorming for this month’s Crazy Ingredient Challenge, where I had to come up with a recipe melding apples and basil, I decided to put a twist on my typical potato kugel with the addition of apples and basil.

Apple Basil Potato Kugel

This kugel recipe was my grandmother’s, though when she typed it out (as she did with many of her recipes…clearly the apple doesn’t fall far from the tree…) she attributed it to Margaret’s niece. So, Margaret’s niece, if you’re reading this, thanks for the great recipe. We enjoy it every year!

Apple Basil Potato Kugel

I used to grate potatoes and onions by hand, but really, there’s no need to work that hard…or add a hint of blood to the dish. This time I used my Cuisinart food processor with the grating blade and saved a ton of time! I highly recommend using the food processor for the grating step if you have one available.

Swapping out a potato for an apple makes this kugel, which can be on the heavier side, a bit lighter in taste. The basil adds a unexpected burst of freshness as well. Try this kugel as a side dish for your holiday dinner, or any meal. L’Shana Tova (have a good year)!

Apple Basil Potato Kugel

______________________________
Apple Basil Potato Kugel

Yield: 12 servings

nonstick cooking spray

3 large russet potatoes

2 medium apples (I used gala)

1 onion

3 large eggs

1/3 cup all-purpose flour

1 1/2 teaspoons salt

1/8 teaspoon ground black pepper

4 tablespoons extra virgin olive oil

1/4 cup lightly packed basil chiffonade (basil sliced into thin strips)

Directions:

1. Preheat the oven to 350F. Coat an 9×13-inch baking dish with nonstick cooking spray.

2. Grate peeled potatoes, peeled and cored apples, and the onion into a bowl. Beat the eggs and add to the potato mixture, along with the flour, salt, pepper, olive oil, and basil.

3. Place in the baking dish and bake for at least 1 hour or until light brown and crisp.

______________________________


HunngryLittleGirl

French Galette with Cherry-Almond Topping

homebaker1

Along with my break from blogging altogether, I also took a break from various bake-alongs this summer and I really missed the comraderie of baking something “together” from across the world! So since this next cake, French Galette with Cherry-Almond Topping, from The Home Bakers sounded tasty, I decided to give it a whirl and get back into the swing of things. It just so happened that I hosted an impromptu dinner for some friends on Labor Day and this treat made a perfect dessert to follow Chicken and Basil Stir Fry along with a Asian themed salad and rice.

So what is a galette? My au pair asked me that as I was preparing it. I always thought it was a free form flat pie or tart, which according to “the internet” is pretty much correct, though it can also be a bread or cake. Though this recipe was taken from the Coffee Cakes cookbook, I expected the crust was going to be a little more pie-like and less dough-like however actually, it came out perfect just as it was, though it’s more like a sweet pizza dough in texture and appearance than a pie or cake.

French Galette with Cherry-Almond Topping

I let yeast bloom in warm water with a pinch of sugar, then using the mixing blade of my stand mixer, I beat in margarine, sugar, an egg, vanilla, salt, and nutmeg. I used freshly grated nutmeg and it smelled amazing, though the regular ground nutmeg would work fine as well. Finally I beat in flour. The dough was a bit sticky and rough. The original recipe recommends placing the dough onto a floured board and kneading at that point, but to save time and clean-up, I switched from the mixing blade to the dough hook, and let it knead itself for a few minutes. The dough became much smoother and elastic and less sticky and then I turned it into a greased bowl, covered it with a towel, and let it rise for about an hour.

After it rose, I punched it down, kneaded it slightly with floured hands, and then formed it into a 12-inch round and fit it onto a greased pizza pan. Since a galette is supposed to be free form and somewhat rustic, I didn’t bother to roll it out with a rolling pin but rather stretched and shaped it into a round with my hands, trying to keep the thickness fairly even throughout.

Then I spread softened margarine over the entire surface, leaving a slight rim at the edges (a la pizza crust), then sprinkled sugar, dried cherries, and blanched almond slivers atop, along with a pinch of cinnamon. One thing I really appreciated about this recipe is that there are unlimited options for topping the dough. I just stuck with the recipe this time just to see how it worked but I guarantee that other fruits or types of nuts would be great. I am picturing an iteration with chocolate in my future. Yum!

After letting the topped dough sit for a little longer, I baked it at high heat for 6 minutes. The aroma was amazing–I felt like I was walking past the pretzel store at the mall with the buttery dough scent emerging from my oven and the cake was beautiful. The crust puffed up and became golden brown. Watch this step closely because it cooks really fast!

French Galette with Cherry-Almond Topping

I cut it up into pizza-style slices and served fresh from the oven with ice cream. This cake is not overly sweet and the cold ice cream was the perfect compliment to the warm cake. Enjoy!

______________________________

French Galette with Cherry-Almond Topping (adapted from Coffee Cakes)

Yield: one 12-inch flatbread (serves 6-8)

For the dough
1 package active dry yeast (2 1/4 teaspoons)

6 tablespoons warm water (105-115F)

pinch of sugar, plus 3 tablespoons

4 tablespoons (1/2 stick) unsalted margarine or butter (I used margarine to keep this dessert dairy free) at room temperature

1 large egg

1 teaspoon vanilla extract

1/4 teaspoon freshly grated or ground nutmeg

1/2 teaspoon salt

1 1/2 cups all-purpose flour

For the topping

2 tablespoons unsalted margarine or butter at room temperature

3 tablespoons sugar

1/2 cup dried cherries

1/2 cup slivered or sliced almonds (I used slivered blanched almonds)

pinch of cinnamon

Directions:

Please see Frozen Wings for the full directions for this recipe.

______________________________

Check out The Home Bakers and see other interpretations of French Galette with Cherry-Almond Topping!

If you love “coffee cakes”, try my Milk Chocolate-Walnut Coffee Cake, Blueberry Stresel Coffee Cake, and Chocolate-Almond Souffle Cake.

Chicken and Basil Stir Fry

This recipe for Chicken and Basil Stir-Fry is quite possibly my favorite chicken recipe ever! It is so quick and simple to make and the flavors come together so beautifully.

DSC_0450

I’m a huge fan of basil. It adds such a wonderful light and summery flavor to lots of dishes. Caprese salad is one of my favorite uses for basil and my favorite Thai restaurant has Basil Fried Rice which is amazing! At my old house, we had extremely hearty basil! The original plant went to seed and the seeds spread throughout my yard. The lawn had various crops of basil (which made mowing it a teeny bit more pleasant thanks to the lovely fragrance) and one plant had a trunk. Yes, it was such a large and healthy plant that it had an actual trunk with tons of basil growing from it! I really miss that. We’re just coming out of winter here and I have no herb garden at the moment. I had to buy basil from the supermarket for this recipe and it was disappointing. I mean, the chicken was still perfect, but within a day of buying the basil, the leaves were wilted, even after putting it in water. Sad. Bottom line, I suppose, is grow your own basil. We will be doing that again soon for sure!

Basil Chicken

Anyway, for this recipe, I cut up a pound of boneless skinless chicken thighs into 1-inch cubes, then combined them with soy sauce and cornstarch in a small bowl. After heating oil in a wok, I stir fried the chicken with garlic until cooked through, then added in chili powder and hoisin sauce. You can also add a chopped up fresh red chili pepper which we’ve done in the past and it’s delicious but to make this more kid friendly I omitted it this time around (and my son still burnt his tongue on the rice. Oops).

Finally, after everything was cooked, I removed the wok from the burner and stirred in thinly sliced fresh basil.

I don’t know what it is about this recipe but the flavors meld together so well. You wouldn’t think it initially, but the basil adds the perfect touch at the end of the cooking process and is really key to bringing all the flavors together. And without the chili pepper it really was kid friendly. After my son recovered from the hot rice incident, he shoveled these little chicken chunks into his mouth with glee! So my food critics were happy and I was too! No leftovers here! Enjoy this quick, simple, and surprisingly flavorful dinner tonight!

Basil Chicken

______________________________

Chicken and Basil Stir Fry (adapted from Step-by-Step Asian Cookbook)

Yield: serves 3-4

1 pound boneless skinless chicken thighs, trimmed and cut into 1 inch cubes or thin strips

1 tablespoon soy sauce

1 tablespoon cornstarch

1 tablespoon peanut oil

2 cloves garlic, minced

1 fresh red chili, seeded and minced (optional)

1 teaspoon chili powder

1 tablespoon hoisin sauce

small bunch of basil leaves, thinly sliced

steamed rice, for serving

Directions:

1. Cut the meat into 1-inch cubes. Place them in a bowl with soy sauce and cornstarch and stir to combine.

2. Heat the oil in a wok over medium heat. Stir fry the chicken, garlic, and chili pepper if using for 8-10 minutes, until the chicken is cooked through.

3. Add the chili powder and hoisin and cook for another 2 minutes. Remove from heat and stir in the sliced basil. Serve over rice.

______________________________


Chocolate-Almond Souffle Cake

homebaker1

It has been a little while since I participated in The Home Bakers group. Unfortunately as work and family commitments have ramped up, the blogging has taken a bit of a nosedive, so I missed the last coffee cake bake along. I thought I was set to miss this one too because it fell right in the midst of Passover and really, how was I supposed to make coffee cake from a regular cookbook during Passover?! But the chocolate and almond combo intrigued me since both chocolate and almonds are just fine during Passover, as were most of the ingredients in this delicious cake, so I just had to come up with a few modifications to make it kosher for Passover.

Chocolate Almond Souffle Cake

Fortunately, my changes did not alter the moist and flavorful composition of this light cake and it’s definitely a keeper for years to come. And don’t get me wrong, no need to be celebrating Passover to enjoy this cake. It’s a winner year round! The almonds add an interesting texture to an otherwise airy cake, which I think would be fantastic topped with whipped cream or vanilla ice cream!

Chocolate Almond Souffle Cake

I started off by coating an 8-inch square pan with nonstick spray and a light coating of matzah cake meal. I toasted raw whole almonds at 325F for about 8 minutes, until fragrant then let cool slightly. Be careful not to let the almonds burn so you don’t end up with a bitter cake. Once cooled, I finely ground the almonds in a food processor and combined with finely chopped bittersweet chocolate and set aside.

Then I beat egg whites until foamy and added in salt and lemon juice (in lieu of the cream of tartar in the original recipe) and beat them until soft peaks formed. I added in brown sugar then beat the mixture until stiff peaks formed.

In a separate mixing bowl I beat the egg yolks until thick and pale then added in more brown sugar, vanilla extract, and almond extract. I stirred matzah cake meal into the almond/chocolate mixture, then folded it into the yolk mixture, then folded in the egg whites.

I spread the batter into the 8-inch pan and baked it at 325F for 35 minutes until it was cooked through and the top sprung back when lightly touched. I let it cool completely before cutting into pieces to serve. It was a welcomed addition at our seder and for the week to come! It lasted throughout Passover kept wrapped at room temperature.

Chocolate Almond Souffle Cake

______________________________

Chocolate-Almond Souffle Cake (adapted from Coffee Cakes)

Yield: 1 8-inch square cake or 1 9-inch round cake

nonstick cooking spray

1 1/3 cups (5 1/2 ounces) slivered or raw whole almonds

4 ounces bittersweet or semisweet chocolate

6 large eggs, separated

1/8 teaspoon salt

1/4 teaspoon lemon juice (instead of the 1/8 teaspoon cream of tartar in the original recipe)

2 tablespoons plus 1 cup firmly packed light brown sugar

1 teaspoon vanilla extract

1/4 teaspoon almond extract

1/3 cup matzah cake meal (instead of 1/2 cup all-purpose flour called for in the original recipe)

Directions:

Please see Life Can Be Simple  for the full directions for this recipe. Other than the pan size and ingredient modifications noted above I followed the recipe as written.

______________________________

Check out The Home Bakers and see other interpretations of Chocolate-Almond Souffle Cake and other coffee cakes featured on The Dinner Pages

Ebony and Ivory: Passover Cookies Two Ways

Whether you celebrate Passover or not, try these Mexican Chocolate Passover Cookies and Passover Chocolate Chip Blondies!

DSC_0590

I was really excited about this month’s Improv Cooking Challenge and creating a recipe on the Ebony and Ivory theme. But, life happened, and I’ve got a lot going on right now so my writing has taken a bit of a back burner even though I’ve still been cooking up a storm and building up my repertoire of recipes to share later on. So I was going to bow out of the challenge. However when doing my Passover baking I realized the desserts I was already planning to make would be perfect. Alone, they both qualify as ebony and ivory. The Mexican Chocolate Cookies are lovely dark treats with a crispy outside and chewy interior, lightened in color by a coat of powdered sugar. In contrast, my Passover Blondies are, well, blonde in color (we’ll call it ivory) and studded with yummy ebony chocolate chips. So they’re both black and white and together, as you can see, they exemplify light and dark, ebony and ivory.

Passover Cookies Two Ways

Now as some of you may know, Passover can be challenging to bake for since a lot of my typical ingredients for baking are out of the question. No flour is a big one. So creativity is essential to come up with substitutions that don’t taste like cardboard. I’m proud to say that my Passover guests agreed that these desserts would be delicious year round. One other great thing about both of these recipes is that they’re both gluten free and dairy free too.

Mexican Chocolate Passover Cookies

Just as a heads up, both recipes take a little bit of planning ahead, the Mexican Chocolate Cookies because the dough needs to be refrigerated for several hours or overnight before shaping and baking, and the blondies because you need vanilla sugar. Now if you already have vanilla sugar you’re golden, but if not it takes 24 hours to make. But overall they are both easy without excessive hands on time.

Passover Chocolate Chip Blondies

These desserts are lovely to serve as a seder dessert (so pin for next year, I know I’m a little late for this year but I couldn’t get the cleaning, prepping, baking, AND blogging done in advance) but they are truly fantastic anytime during Passover or otherwise. Despite my Ebony and Ivory theme, no need to be strictly black and white and only enjoy these treats during Passover!

Passover Cookies Two Ways

______________________________
Mexican Chocolate Passover Cookies (adapted from The Holiday Kosher Baker)

Yield: 2 1/2 dozen cookies

1/3 cup vegetable oil

1 cup sugar

1/2 cup unsweetened cocoa powder

2 large eggs

1 teaspoon vanilla

1 cup potato starch

1/4 teaspoon salt

1/2 teaspoon ground cinnamon

1/3 cup confectioners’ sugar

Directions:

1. In a mixing bowl combine the oil, sugar, cocoa, eggs, and vanilla. Then add in the potato starch, salt, and cinnamon and mix until fully combined. Refrigerate overnight (I refrigerated mine for 7 hours which was enough).

2. Preheat the oven to 350F. Line two cookie sheets with parchment paper. Roll walnut sized pieces of cookie dough in confectioners’ sugar then place on the cookie sheet at least 1 1/2 inches apart.

3. Bake for 14 minutes. The cookies will still be somewhat soft, but not raw. Let cool slightly then transfer to a wire rack to cool completely.

______________________________

Passover Chocolate Chip Blondies (adapted from The Holiday Kosher Baker)

Yield: 24 bars

nonstick cooking spray

2 cups granulated sugar

2 large eggs

1 cup vegetable oil

2 tablespoons vanilla sugar (see below)

3 1/4 cups ground almonds or almond meal

1/4 cup potato starch

1 cup chocolate chips (I used semi-sweet)

Directions:

1. Preheat the oven to 350F. Coat a 9×13-inch baking pan with nonstick spray then fit in a piece of parchment paper to coat the bottom and sides of the pan. Coat the parchment with cooking spray as well.

2. Beat together the sugar, eggs, oil, and vanilla sugar in a mixing bowl with an electric mixer until combined. Add in the ground almonds and potato starch and mix fully. Stir in the chocolate chips, then add the batter to the prepared pan.

3. Bake for 35-40 minutes, until the edges are brown and a knife inserted into the center comes out clean. Let cool then remove the parchment paper from the pan and cut into bars.

______________________________

Vanilla Sugar

Yield: 1 cup

Slice a vanilla bean down its entire length. Add to a container of granulated sugar. Cover and let sit overnight.

______________________________

Check out other bloggers’ takes on the Ebony and Ivory Improv Cooking Challenge theme here:

Taco Salad with Crispy Tortilla Bowl

My current job has a really fun Taco Tuesday tradition. Somehow I didn’t know about this into well into my time there but on Tuesdays, the line practically runs out the door while people wait for their yummy lunchtime tacos. Unfortunately I’m moving on and won’t be there for any more Taco Tuesdays. So, in homage to the cafeteria, PLUS to feed my hungry child, I decided to make my own tacos. In addition, my husband is always a fan of those taco salads that come in the edible tortilla bowl so I decided to surprise him with that treat for dinner too. Success all around! This dinner will satisfy your hungry family for sure!

Taco Salad with Crispy Tortilla Shell

To make the tortilla bowl, I placed medium sized flour tortillas into a brioche pan. I’ll be honest, I have no idea why I have brioche pans because I’ve never made (and possibly never even eaten) brioche (though I want to, after all, it is bread). But anyway, I put the tortillas into the pans, sprayed a light coating of nonstick olive oil spray on them, and baked them in a moderate (300 degree) oven for 25 minutes until crispy and lightly golden. Keep an eye on them because your oven may be quicker than mine and you don’t want a charred taco shell. If you aren’t lucky enough to be cluttering your kitchen cabinets with brioche pans, other pans will work too to create the shell, possibly a small metal (oven-safe) bowl. A quick pinterest search showed me that some people use an inverted muffin tin to get the right shape. So you have options. Or just use the taco filling for soft tacos, it’s still awesome!

Tortilla Shell

For the filling, I cooked onions in a large skillet until softened, then added garlic, chili powder, cumin, and coriander. You can use a jalapeno too if you prefer extra spice. Then I added ground beef and cooked it until it was browned. Finally, I added in a can of crushed tomatoes and let the mixture cook until the liquid was evaporated because no one needs watery tacos!

Taco Salad with Crispy Tortilla Shell

The last step is decorating your taco salad with all your favorite toppings. I stuck with veggies, just some chopped lettuce, tomato, and onions but feel free to dress it up with guacamole, cheese, sour cream, or whatever floats your boat! Picky eaters will love to adorn their own individual tacos.

Taco Salad with Crispy Tortilla Shell

Don’t forget, Cinco de Mayo isn’t too far off…this would be a perfect way to celebrate–with a large margarita of course!

______________________________

Taco Salad with Crispy Tortilla Bowl (adapted from Everyday Food)

Yield: serves 6-8

6-8 medium flour tortillas

nonstick cooking spray

1 tablespoon vegetable oil

2 1/2 cups finely chopped onion (I used 4 small onions)

1 tablespoon minced garlic (about 6 cloves)

1 jalapeno chile, minced (optional)

1 tablespoon chili powder

1 tablespoon ground cumin

1 tablespoon ground coriander

2 pounds lean ground beef

1 can (28 ounces) crushed tomatoes

salt, to taste (I used 3/4 teaspoon)

fillings for taco salad such as lettuce, tomato, onion, olives, black beans, salsa, guacamole, sour cream, cheese, etc. (your choice!)

Directions:

1. For the taco shell, place the tortillas into a brioche pan, on an inverted muffin tin, or in any oven proof bowl. Lightly coat with the nonstick spray. Bake at 300F for 20-25 minutes, checking frequently to ensure not too browned. Let cool slightly in pan.

2. Heat the oil in a large skillet over medium-high heat. Add the chopped onion and cook until softened and lightly browned, about 5 minutes. Then add in the garlic and other spices, stirring the mixture together.

3. Add the ground beef to the pan, breaking it up with a spoon, and cook until no longer pink, about 5 minutes. Stir in the tomatoes and cook, stirring frequently to avoid sticking, until the liquid has evaporated, about 15-20 minutes. Season with salt to taste.

4. Carefully remove the taco shells from the pan and place onto a plate. Fill the shells with the beef mixture and your toppings of choice.

_____________________________

Easy Spaghetti and Meatballs

Since my son started eating “real” food, meatballs have become one of the most frequently served dinners in our household. I like to mix it up, sometimes using beef, sometimes turkey, and I use a variety of seasonings and sauces. But sometimes it’s nice to stick with traditional Spaghetti and Meatballs. This recipe doesn’t require hours of your time. It’s fast enough to make for a weeknight dinner though still hearty and satisfying so you feel like you’re sitting down for a relaxing family meal.

Easy Spaghetti & Meatballs

The meatballs include standard ground beef, onion, breadcrumbs (I used panko), garlic, salt, pepper, oregano, and an egg white to help bind everything together. Easy so far. I’ll admit this recipe “cheats” a little and includes jarred tomato sauce. I love to make everything from scratch but I have my hands full with a full time job and a toddler and sometimes (okay, realistically, always) there just aren’t enough hours in the day sometimes to do it all. So jarred sauce it is.

Easy Spaghetti and Meatballs

After forming the meatballs from the ground beef mixture, I lightly browned them in a nonstick skillet coated with a little olive oil cooking spray. I then added the prepared tomato sauce, spiced it up with a little basil, and let simmer for 10 minutes. I made the pasta while the sauce was simmering and the dinner was ready before I knew it, about 40 minutes max. Save time after work by chopping the onions in advance or preparing the meatballs in advance and refrigerating the uncooked meatballs until you’re ready to brown them. I bet this would freeze well too!

Easy Spaghetti and Meatballs

Like all the meatballs I’ve shared here, my son was a HUGE fan! No leftovers for us! He’s only 18 months old but I’m sensing my grocery bills are going to be nuts when he’s a teenager since he can already down quite a bit! But I love cooking for him. And seeing his excitement when he finds something really yummy, like these Easy Spaghetti and Meatballs, is so worth it!

______________________________

Easy Spaghetti and Meatballs (adapted from Cooking Light Five Star Recipes)

Yield: serves 4

1 pound ground beef

1/4 cup minced fresh onion

2 tablespoons panko bread crumbs

1/4 teaspoon garlic powder

1/8 teaspoon salt

1/4 teaspoon ground black pepper

1/4 teaspoon oregano

1 large egg white, lightly beaten

1 jar (about 25 ounces) of tomato sauce (tomato and basil flavor works great), divided

cooking spray

1/2 tablespoons dried basil

8-12 ounces uncooked spaghetti

Directions:

1. In a mixing bowl, combine the beef, onion, bread crumbs, garlic, salt, pepper, oregano, egg white, and 2 tablespoons of the tomato sauce. Shape into 20-24 meatballs, about 1.5-2 inches in diameter.

2. Coat a large nonstick skillet with cooking spray and place over medium heat. Brown the meatballs on all sides for 6 minutes. Pour in the remaining tomato sauce and add the dried basil, reduce heat to low, cover, and simmer for 10 minutes.

3. While the sauce is simmering, boil water and prepare the pasta according to package directions. Serve meatballs over spaghetti. Garnish with basil or cheese if desired.

______________________________

Asian Chicken Lettuce Cups

Readers of The Dinner Pages are well aware that I’m not afraid of carbs. I mean, Banana Bread Butter Pecan Ice Cream Sandwiches and Red Velvet Molten Lava Cakes with Cream Cheese Ice Cream are not exactly light fare! But sometimes, in the midst of all those carbs, I need a break and need a quick, easy, meal that’s not so heavy. These Asian Chicken Lettuce Cups fit the bill!

Asian Chicken Lettuce Cups

I quickly browned ground chicken in a wok, then added shredded carrots for texture and color, and garlic and the whites of green onions for flavor. I stirred in a simple sauce containing hoisin, soy sauce, and some water, and let it thicken up briefly.

Asian Chicken Lettuce Cups

I served the chicken mixture on crisp lettuce leaves, garnished with green onions. The hoisin results in a slightly sweet flavor to the chicken, but it’s balanced by the saltiness of the soy sauce and the garlic. It’s a great dinner for the whole family. My toddler was literally trying to climb into his high chair to start eating it (a big change from the norm when he is kicking and flailing around to avoid sitting down to dinner!).

Of course, if you really miss your carbs, you can totally serve the chicken over steamed white rice! It’s great that way too!

Asian Chicken Lettuce Cups ______________________________

Asian Chicken Lettuce Cups (adapted from Every Day with Rachael Ray, January/February 2014)

Yield: serves 4

1/4 cup hoisin sauce

1 tablespoon reduced sodium soy sauce

2 tablespoons vegetable oil, divided

1 pound ground chicken (or turkey)

1/2 cup matchstick carrots (or 1 carrot, peeled and finely diced)

3 cloves garlic, finely minced

4 green onions, whites and greens separated and chopped

1 head romaine lettuce (or the lettuce of your choice)

Directions:

1. Combine the hoisin sauce, soy sauce, and 1/3 cup of water in a small bowl. Set aside.

2. In a large nonstick wok, heat 1 tablespoon of the oil over medium-high heat. Add the chicken and cook until browned, about 6-8 minutes. Reduce the heat to medium and add the carrot and the other tablespoon of oil. Cook for 2 minutes, stirring frequently.

3. Add the garlic and the whites of the green onions and cook for 1 minute. Stir in the hoisin mixture and cook until the sauce thickens, about 2 minutes.

4. Divide the lettuce leaves among 4 plates and top with the chicken. Garnish with green onions before serving.

______________________________

Slow Cooker Chicken Stew with Dumplings and Stout

Well, St. Patrick’s Day just kind of crept up on me and now it’s here. Before we move on to the next fun food holiday recipes, here’s just one more for March 17. I’ve already said that my little kitchen leprechaun refused to let any green recipes be successful this year so I had to try another way to get a little “luck o’ the Irish” into my kitchen. Using Guinness, which hails from Dublin, Ireland, in my recipe is the perfect way to infuse a little “green” into your dinner, whether for St. Patrick’s Day or any other day. Plus any time I find myself with a little extra time, I consider myself VERY lucky, and using my slow cooker might just save me a few minutes. Win!

Slow Cooker Chicken Stew with Dumplings and Stout

I started off with boneless skinless chicken thighs, which I dredged in a little flour, salt, and pepper. I lightly browned them over the stove, then put them into the ceramic bowl of the slow cooker. To the chicken drippings I added more flour, plus a bottle of Guinness and some brown sugar and stirred it all together until it was smooth. I poured this over the chicken thighs in the slow cooker, then added chopped carrots, onion, garlic, thyme, and chicken broth.

Slow Cooker Chicken Stew with Dumplings and Stout

I cooked the stew on high for 3 1/2 hours, then added in fluffy dumplings and peas, seasoned with salt and pepper, and cooked for another 30 minutes.

Slow Cooker Chicken Stew with Dumplings and Stout

It turned out like the Irish version of matzah ball soup, very hearty and flavorful, and a delicious comfort food. Perfect with my quick Irish Soda Bread! Slainte!

Slow Cooker Chicken Stew with Dumplings and Stout

______________________________

Slow Cooker Chicken Stew with Dumplings and Stout (adapted from The Complete Irish Pub Cookbook)

Yield: serves 6-8

6 tablespoons plus 1/2 cup all-purpose flour, divided

1 teaspoon salt, divided, plus more to taste

1/2 teaspoon freshly ground black pepper, plus more to taste

2 pounds boneless skinless chicken thighs, trimmed

4 teaspoons extra virgin olive oil, divided

2 teaspoons dark brown sugar, packed

1 2/3 cups Guinness Stout

6 carrots (1 pound), peeled and cut into 1-inch pieces

2 large onions, thinly sliced

2-4 cloves of garlic, minced

1 1/2 teaspoons dried thyme

1 cup lower sodium chicken broth

2 cups frozen peas

For the dumplings:

1 cup all-purpose flour

1 1/2 teaspoons baking powder

1/2 teaspoon salt

1/4 cup shortening

1 1/2 teaspoons dried dill

1/4 cup water

Directions:

1. Combine 6 tablespoons of flour with 1/2 teaspoon of salt and 1/2 teaspoon of black pepper in a shallow bowl. Coat the chicken thighs in the flour mixture and transfer to a plate.

2. Heat 2 teaspoons of oil in a large skillet over medium-high heat. Add half of the chicken and cook until well browned, 2-4 minutes per side. Transfer to a slow cooker once browned. Reduce heat to medium, add 2 more teaspoons of oil, and cook the remaining chicken until browned. Add to slow cooker.

3. To the drippings from the chicken remaining in the skillet, add 1/2 cup flour, the Guinness, and the brown sugar, and stir until smooth. Transfer to the slow cooker.

4. Add the carrots, onion, garlic, and thyme to the slow cooker. Pour the chicken broth on top. Cover and cook on high for 3 1/2 hours.

5. For the dumplings, combine the flour, baking powder, and salt in a bowl. With your hands, add in the shortening, dill, and a little bit of the water at a time to make a soft dough. Shape the dough into walnut-sized balls between the palms of your hands. Add the dumplings to the slow cooker at the 3 1/2 hour mark.

6. Add the peas (they can still be frozen) right after the dumplings. Cook on high for another 30 minutes then switch to warm until ready to serve. Serve with Irish Soda Bread.

______________________________

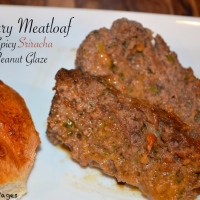
Curry Meatloaf with Spicy Sriracha Peanut Glaze

I was so excited to participate in this monthly recipe swap through “What’s Cooking?” because I finally met the minimum number of recipes. Just barely but hey, it counts! I was assigned to try a recipe from Ashley of Cheese Curd in Paradise. I immediately went to her blog to check it out and spent an hour reading through her recipes as well as the fun stories about her life that she intersperses throughout. Her son is only a few months younger than mine so I loved that we have similar challenges when it comes to cooking for our families now. I had a hard time choosing which recipe to prepare because several really caught my eye to include the Indian Spiced Meatballs and Red Velvet Cheesecake but I eventually settled on Curry Meatloaf with Spicy Sriracha Peanut Glaze because the flavors sounded really interesting and I know my son does well eating foods with ground meat. It did not disappoint!

Curry Meatloaf with Spicy Sriracha Peanut Glaze

I made a few changes to the original recipe, using panko breadcrumbs instead of crushed up saltines and coconut milk instead of cow’s milk to keep it dairy free. Unfortunately once I took it out of the oven and sliced it there were still some slightly pink parts within so I had to put it back in the oven for another 10 minutes but that was really the only snafu.

Curry Meatloaf with Sriracha Peanut Glaze

The meatloaf was moist and flavorful and the glaze was delicious. The sweet combination of peanut butter and orange juice coupled with soy sauce and a hint of sriracha was fantastic. It was definitely not overly spicy. My son loved it. He had thirds! Can we say growth spurt anyone?! Anyway, we very much enjoyed this unique twist on meatloaf and will definitely make it again. Thanks Ashley at Cheese Curd in Paradise for sharing your delicious recipe with me!

DSC_0059

______________________________

Curry Meatloaf with Spicy Sriracha Peanut Glaze (adapted from Cheese Curd in Paradise)

Yield: 1 meatloaf

For the meatloaf:

nonstick cooking spray

2 pounds ground beef

2 tablespoons minced green bell pepper

2 tablespoons minced white onion

1/2 cup panko bread crumbs

1 egg

1/8 cup unsweetened coconut milk (can use regular milk if you prefer)

1/2 teaspoon salt

1/2 teaspoon freshly ground black pepper

1/2 teaspoon paprika

1/8 cup finely chopped fresh cilantro

1/4 teaspoon ground ginger

1 teaspoon curry powder

1/4 cup ketchup

For the glaze:

1/3 cup peanut butter

2/3 cup fresh orange juice

1 tablespoon light brown sugar, packed

1 teaspoon soy sauce

1 1/2 teaspoons sriracha

pinch of salt and pepper


Directions:

1. Preheat the oven to 375F. Coat a 9×5-inch loaf pan with cooking spray.

2. Combine all of the meatloaf ingredients in a large mixing bowl and mix by hand until well combined. Press the meatloaf mixture into the loaf pan.

3. Bake for 45 minutes.

4. Meanwhile, combine the ingredients for the glaze in a small mixing bowl.

5. After 45 minutes, remove the meatloaf from the oven, drain any grease that may be there, then top the meatloaf with the glaze.

6. Return to the oven for an additional 15-20 minutes or until the center is no longer pink.

7. Let sit for 10 minutes before slicing and serving.

______________________________

If you like this recipe, also check out Cheese Curd in Paradise for more recipes from Ashley! Thanks to Sarah from A Taste of Home Cooking for hosting!