Red Velvet Hamantaschen

The Jewish festival of Purim celebrates the defeat of Haman’s plot of destroy the Jews in ancient Persia as recorded in the book of Esther. It is a happy holiday with costumes and celebrations. My favorite part is the food, of course, particularly the hamantaschen. Hamantaschen are triangular pastries, traditionally filled with poppy seeds, but now they come in a wide variety of flavors. The triangular appearance of these yummy treats may originate from the shape of Haman’s hat. Purim is also associated with the gifting of food, mishloach manot, and hamantaschen are usually part of the package. I have fond memories of my grandmother mailing us a shoebox stuffed with hamantaschen each year, with filling flavors including peanut butter, cream cheese, apricot, and raspberry. It was always such a treat!

Hamantaschen

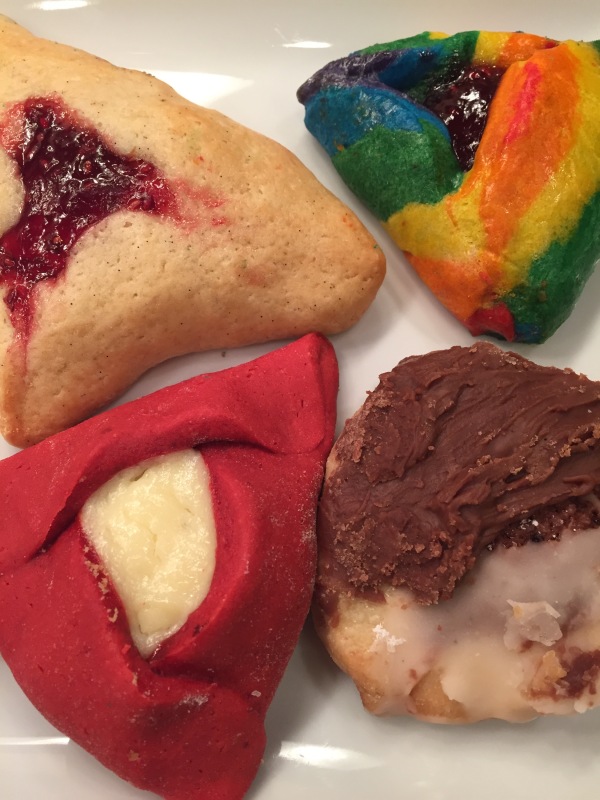
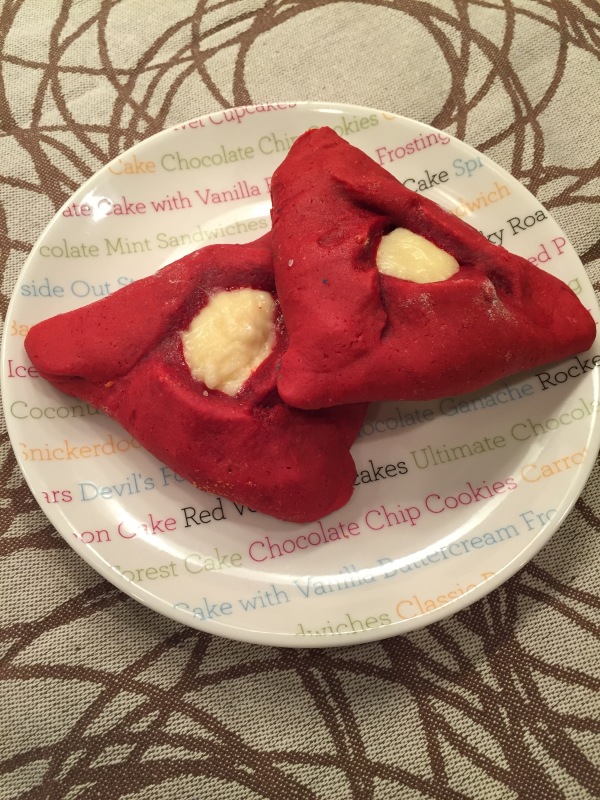
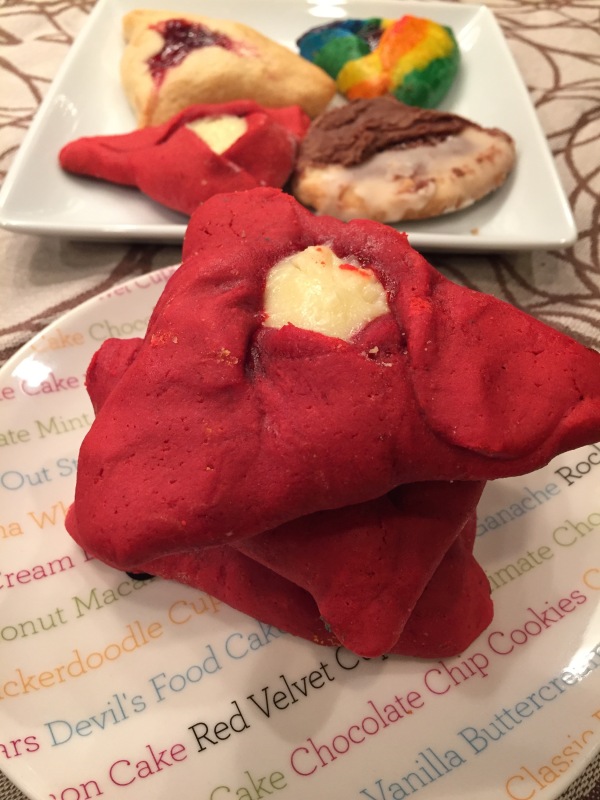
In order to build up a big stash of hamantaschen to gift, I got together with a few friends this weekend and we, along with our young kids to “help,”, made 5 different types of hamantaschen ranging from traditional fruit filled, to rainbow (super gorgeous and impressive), to black and white (yummy but not so triangular) to red velvet. The Red Velvet Hamantaschen were a last minute addition to our repertoire but were a perfect foil to my grandmother’s traditional cream cheese filling, looked gorgeous, and tasted great. And let’s be real, I just moved back to the south, so everything needs to be red velvet, right?

Red Velvet Hamantaschen

Some general pointers for Red Velvet Hamantaschen and hamantaschen in general:

  • Refrigerate the dough before trying to roll it out. It makes it less sticky and you want the dough to be fairly cold when you bake it so it holds it shape and doesn’t spread out everywhere, because spreading dough causes spreading topping and those usually aren’t so triangular.
  • Do not overfill your hamantaschen. It is tempting to pile in the filling. Restrain yourself. Otherwise it’ll leak out and make a big mess on your cookie sheet.
  • For the red velvet goodies, roll out the dough on a cutting board or parchment paper. You don’t want to risk the red food dye staining your counter. Or your hands…just be careful during the preparing the dough process. I didn’t have much trouble with red hands while rolling out the dough.
  • Make sure the hamantaschen sides are well sealed before baking. You can use the “pinch” method or the “fold” method to seal the edges but just do something to prevent the filling from leaking.

Hamantaschen

______________________________

Red Velvet Hamantaschen (adapted from The Holiday Kosher Baker)

Yield: 18-24 hamantaschen

Ingredients for Dough:

3 eggs

1 cup granulated sugar

1/2 cup vegetable oil

1 teaspoon vanilla extract

2 1/2 teaspoons red gel food coloring

3 cups all-purpose flour (plus extra for rolling out the dough)

1 tablespoon unsweetened cocoa powder

Pinch of salt

Ingredients for Filling:

1/2 pound (8 oz. block) cream cheese

1 egg yolk

1/4 cup granulated sugar

1/8 teaspoon vanilla extract

Directions:

  1. In a large mixing bowl, combine the eggs, sugar, oil, and vanilla. Add in the food coloring and mix until well blended and the color is uniform throughout.
  2. Add in the flour, cocoa, and mix until combined.
  3. Cover with plastic wrap and refrigerate for 1 hour.
  4. Meanwhile, make the filling by mixing together all of the ingredients until well blended. Refrigerate for at least 30 minutes prior to using.
  5. After an hour, remove the dough from the refrigerator. Preheat the oven to 350F. Line 2 cookie sheets with silicone baking mats or parchment paper.
  6. On a cutting board or parchment paper sprinkled lightly with flour, roll out the dough until about 1/4-inch thick. Turn over the dough at least once while rolling it out to make sure it’s not sticking too much underneath.
  7. Using a 2-3 inch diameter drinking glass or cookie cutter, cut the dough into circles. Collect the scraps and roll out again to make more circles until all the dough is used up. Place about 1 teaspoon of cream cheese filling in the center of each circle.
  8. Fold the 3 sides into the middle to form a triangle, making sure to pinch carefully along each edge to avoid leaking filling.
  9. Bake for 14-16 minutes until the cookies are set. Carefully transfer to cooling racks.
  10. Store in airtight containers at room temperature. Can also be frozen for several months.

______________________________

Snow Day Soft Pretzels

Full disclosure: where I live, we haven’t had a snow day this winter. The only snow I even came into contact with was when we played with store bought snowballs at the Frozen birthday party I attended this weekend–while wearing flip flops. When the temperature dropped overnight and I had a teeny bit of ice to scrape off my windshield this morning I had to search my garage for an ice scraper. So I personally don’t need snow day activities. However, growing up in the Northeast US, we had plenty of snow days and I’m sure my mom was always looking for random things to keep me and my siblings occupied (and this was before the days of Pinterest. Gasp!).

Snow Day Soft Pretzels

But while weather hasn’t been a challenge for me this winter, my husband has been out of town for almost 6 weeks for work so I’ve still been trying to come up with creative ways to entertain my toddler son in the evenings and on weekends and one of my favorite ways to do that is in the kitchen. I love to cook and bake, he loves to eat and “help” in the kitchen. So we’ve made lots of smoothies, we’ve made flavored popcorn, we’ve made pizza from scratch, and my new favorite is soft pretzels.

Snow Day Soft Pretzels

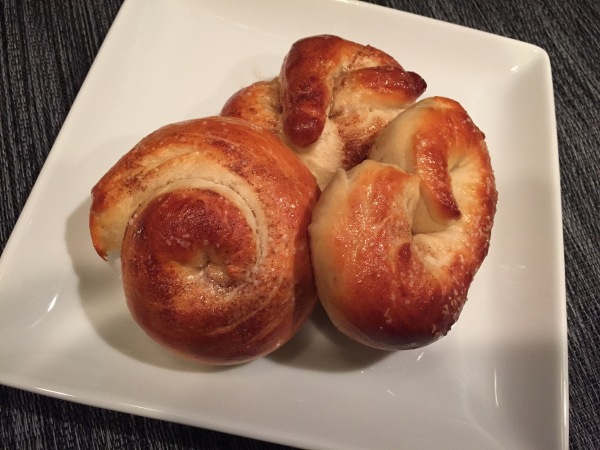
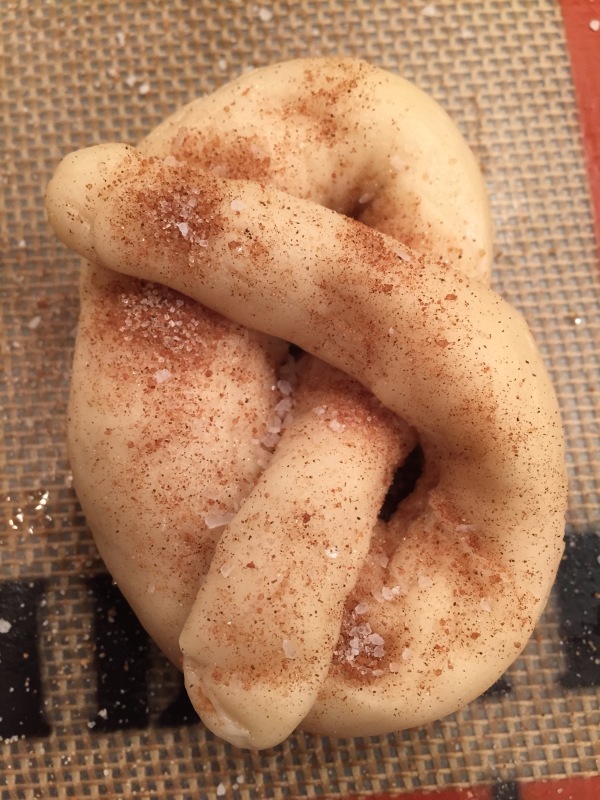
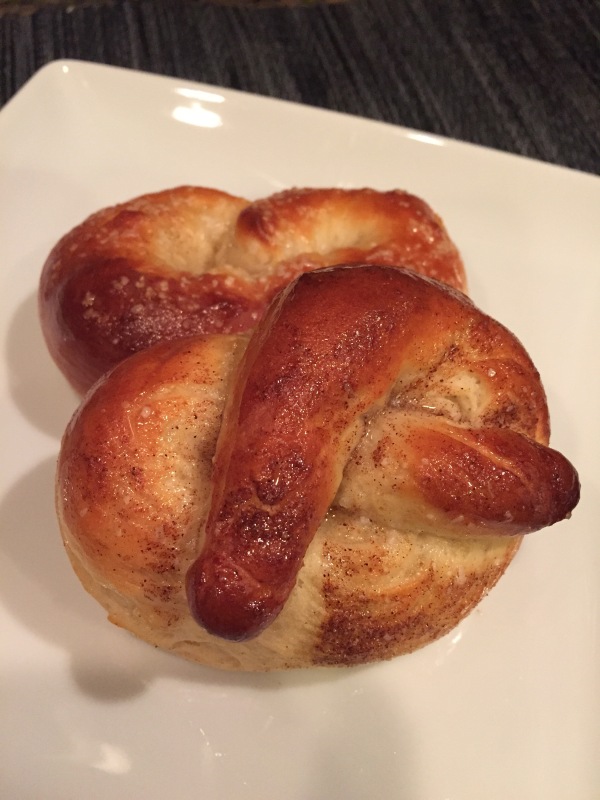
For a while I was on a soft pretzel kick from the cafeteria at work. They’re not even all that good from there, but the crispy salty exterior with the soft chewy inside is definitely comforting. Homemade ones, though, especially when fresh out of the oven and brushed with melted butter, totally hit the spot. There are a number of ways to make baking these pretzels educational (in additional to delicious) for your kiddos too. Older kids can help with the measuring process while making the dough, lots of math skills there, or watching the yeast ferment (yay biology). My son is too young for those concepts, but we form the pretzels into various shapes and letters so he can practice his alphabet and shapes. He also loves topping them with salt or cinnamon sugar and brushing them with butter which are great fine motor skills practice for toddlers. In the end, we’re left with a tasty treat which makes everyone happy.

So warm up your insides with these easy and delicious Snow Day Soft Pretzels. (PS I was able to make these after work and still have pretzels ready to eat before bedtime).

Snow Day Soft Pretzels

______________________________

Snow Day Soft Pretzels (adapted from Baking Bread the Way Mom Taught me)

Yield: 16 pretzels

Ingredients:

1 package active dry yeast (2 1/4 teaspoons)

1 1/2 tablespoons honey, divided

1/4 cup lukewarm water

1/2 cup milk

2 1/2 cups water, divided

4 tablespoons unsalted butter, divided

1 teaspoon salt

3 1/2 cups plus 1 tablespoon all-purpose flour

1 egg

1/2 teaspoon baking powder

1/2 teaspoon vegetable oil

1/2 tablespoon baking soda

Coarse salt and/or cinnamon sugar, for topping

Directions:

  1. Combine yeast, 1/2 tablespoon of honey, and lukewarm water in a small bowl. Set aside for 5-10 minutes until foamy.
  2. Meanwhile, heat milk, 1/2 cup water, and 2 tablespoons butter in a small saucepan until hot. Transfer to a large mixing bowl (of a stand mixer fitted with a dough hook if possible).
  3. To the mixing bowl, add the remaining honey, salt, and 1 cup of flour and blend thoroughly. Mix in the egg, then the yeast.
  4. Add in the baking powder and the rest of the flour, little by little, mixing with the dough hook after each addition. Continue kneading with the dough hook for 5-10 minutes until the dough forms a ball, and is smooth and no longer sticky.
  5. Place the oil in another mixing bowl. Coat the ball of dough in the oil, then set in the mixing bowl, cover with a towel, and set aside in a warm area to rise for 1 hour.
  6. After the dough has risen, punch down the dough then place into the refrigerator for 30 minutes (up to 2 hours).
  7. Place the baking soda and remaining 2 cups of water in a small saucepan and heat until the baking soda is dissolved (can omit this step but the toppings may stick less well)
  8. Remove from the refrigerator and divide into 16 pieces (can divide into fewer pieces for larger pretzels).
  9. Roll each piece of dough into a long snake then shape as desired, into a pretzel knot, alphabet letter, shape, etc.
  10. Dunk the pretzel into the baking soda/water mixture and if still hot, remove using a slotted spoon. Place on a baking sheet lined with parchment paper or silicone mat. Top with coarse salt, cinnamon sugar, or any other desired toppings.
  11. Cover with a towel and let rise for 15 minutes while the oven is preheating to 400F.
  12. Bake at 400F for 15-20 minutes until golden brown.
  13. Brush with 2 tablespoons melted butter. Best enjoyed warm.

______________________________


What's Baking Badge

White Chocolate Raspberry Pancakes

Since Valentine’s Day falls on a weekend this year, why not start off your day with these delectable White Chocolate Raspberry Pancakes?


White Chocolate Raspberry Pancakes

My husband is out of town for work right now so I’m spending Valentine’s Day with my littler love, my toddler son, who is a huge pancake fan. For awhile IHOP was one of his favorite restaurants, so I had the opportunity to check out their menu on many occasions. The last time we ate there I tried the white chocolate raspberry pancakes. They were tasty but super sweet and a bit artificial. I knew I could do it better!

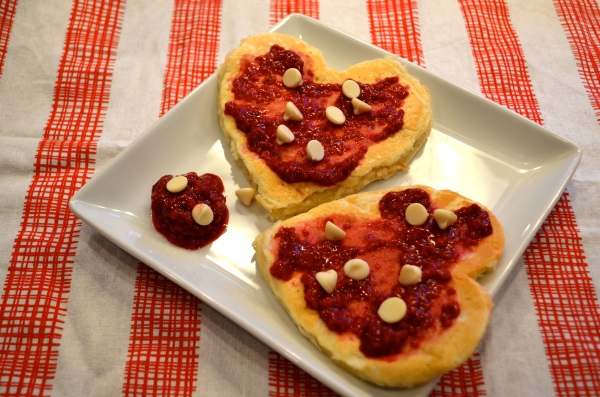
I made a raspberry puree using frozen raspberries, not in any kind of sugar or syrup, since I knew the white chocolate would make the pancakes sweet enough for breakfast. To add to the festivities, I made the pancakes heart-shaped. To do this, I placed a metal heart-shaped cookie cutter, about 5 inches in diameter on my griddle. I poured about 1/4 cup of batter into the cookie cutter and spread it around evenly. When it was time to flip the pancakes, I left the cookie cutter in place to ensure the batter did not spread outside the boundaries of the heart. After flipping I gently pushed down the pancake to ensure it was in contact with the griddle. Toward the end of cooking each pancake I carefully removed the cookie cutter. My son was so delighted by the heart shaped pancakes. He told his daddy on Skype “I’m eating heart shaped pancakes for breakfast!” Aw! If you don’t have heart shaped cookie cutters, though, the round pancakes were just as yummy!

White Chocolate Raspberry Pancakes

Happy Valentine’s Day to you and your loved ones! I hope you enjoy these beautiful and delicious White Chocolate Raspberry Pancakes as much as we did!

White Chocolate Raspberry Pancakes

______________________________

White Chocolate Raspberry Pancakes

Yield: 10 pancakes

Ingredients:

1 1/2 cups all-purpose flour

3 1/2 teaspoons baking powder

1 teaspoon salt

1 1/4 cups milk (any kind is fine)

1 egg

3 tablespoons melted butter (unsalted)

1/2 cup white chocolate chips

1 cup frozen raspberries

fresh raspberries for garnish (optional)

Directions:

  1. In a mixing bowl, combine the flour, baking powder, and salt. Add in the milk, egg, and butter and whisk together until fully combined. The batter may remain a little lumpy. Stir in the white chocolate chips.
  2. Heat your pancake griddle on high (I have the Cuisinart Griddler and heated mine to 425F).
  3. For heart-shaped pancakes, place a metal cookie cutter onto the griddle and fill with about 1/4 cup of batter. Let cook until bubbly and golden brown on the bottom, then flip, keeping the cookie cutter in place. Gently push down the pancake to ensure it remains in contact with the griddle. When nearly done, carefully remove the cookie cutter.
  4. For round pancakes, drop 1/4 cupfuls of batter onto the griddle. Let cook until bubbly and golden brown on the bottom, the flip and continue cooking until golden on both sides.
  5. Meanwhile, for the raspberry sauce, place the frozen raspberries into a small saucepan on the stove on medium. Cook until warm and slightly reduced, so the fruit becomes more of a sauce.
  6. Top the pancakes with raspberry sauce, garnish with fresh raspberries if desired, and serve right away.

Note: if you like a lot of sauce on your pancakes, you may want to increase the frozen raspberries to 2 cups.

______________________________

Gingerbread Blossom Cookies

I know, I know. It’s very last minute to share this holiday cookie recipe with you. After all we’ve already lit the last Hanukkah candle, and Christmas Eve is upon us. But just in case you’re still looking for a delicious treat to enjoy this holiday season, I figured I’d still share these tasty Gingerbread Blossom Cookies. I’ve been meaning to post this recipe for a while, but somehow 6 Hanukkah events plus 3 traditional holiday parties plus seemingly hundreds of potato latkes, a toddler, and a job got in between me and my blog. But anyhow, gingerbread is so good you can enjoy it well after the holiday season passes.

gingerbread blossom 1

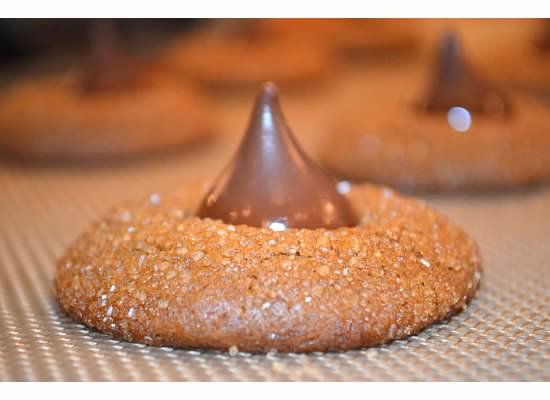
I was lucky enough to receive a bag of Hershey’s Kisses from Influenster and I knew I wanted to bake something with them, though I have to say, I was tempted to unwrap one of those shiny little Kisses and dig in as soon as I opened my box from Influenster. I spent some time researching Hershey’s Kiss recipes. And believe me, there are tons out there on the internet. I know the Peanut Butter Blossom cookies are somewhat traditional this time of year, and even showed up in my Hershey’s cookbook, but since I really love the flavors in gingerbread, I figured I’d veer slightly off the peanut butter path (though chocolate and peanut butter in combination are pretty darn delicious too) to the gingerbread world.

gingerbread blossom 2

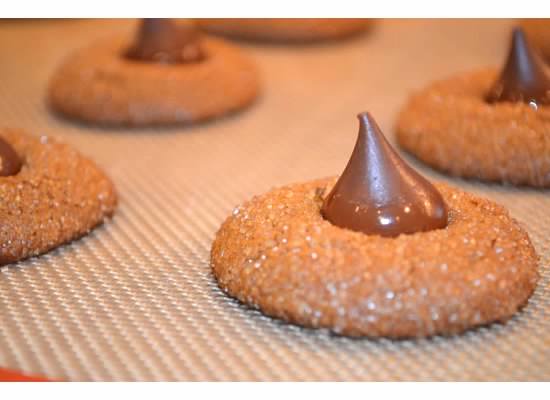
The final product is amazing. Crispy on the outside, chewy on the inside ginger cookies, complete with a smooth chocolate-y Kisses perched on top. I hope you enjoy a wonderful and sweet holiday season with your friends and family and I’m looking forward to sharing more recipes on The Dinner Pages in the coming year.

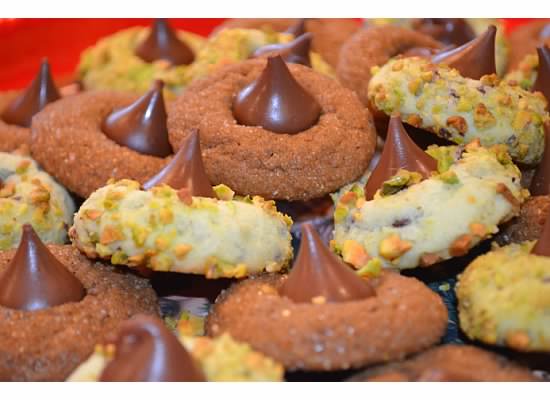
gingerbread blossom 3(I’ll make sure to come back and share my yummy Pistachio Blossom cookie recipe one day soon!)

______________________________

Gingerbread Blossom Cookies (adapted from Cinnamon-Spice & Everything Nice)

Yield: 4-5 dozen cookies

Ingredients:

3 cups all-purpose flour

2 teaspoons ground ginger

1 teaspoon ground cinnamon

1 teaspoon baking soda

1/4 teaspoon ground nutmeg

1/4 teaspoon salt

3/4 cup (1 1/2 sticks) unsalted butter, softened

3/4 cup firmly packed light brown sugar

1/2 cup molasses

1 egg

1 teaspoon vanilla extract

1/4 cup turbinado (or granulated)

48-60 Hershey’s Kisses, unwrapped

Directions:

  1. In a large mixing bowl combine the flour, ginger, cinnamon, baking soda, nutmeg, and salt. Set aside.
  2. In the bowl of an electric mixer, cream the butter and brown sugar together until light and fluffy. Add molasses, egg, and vanilla and mix until combined.
  3. Gradually add in the dry ingredients on low speed until fully mixed. Remove from the bowl, wrap in plastic wrap, and refrigerate for 1 hour.
  4. Preheat the oven to 350F. Shape dough into 1-inch balls, coat all over in turbinado sugar, and place 2 inches apart on baking sheets lined with parchment paper or silpats.
  5. Bake 8 to 10 minutes. The edges of cookies will just begin to brown. Remove from the oven and immediately press an unwrapped Hershey’s Kiss into the center of each cookie.
  6. Transfer to wire racks to cool completely.

______________________________

Here’s another yummy ginger cookie recipe from The Dinner Pages!


What's Baking Badge


I received Hershey’s Kisses complimentary from Influenster for testing purposes but all opinions are my own.

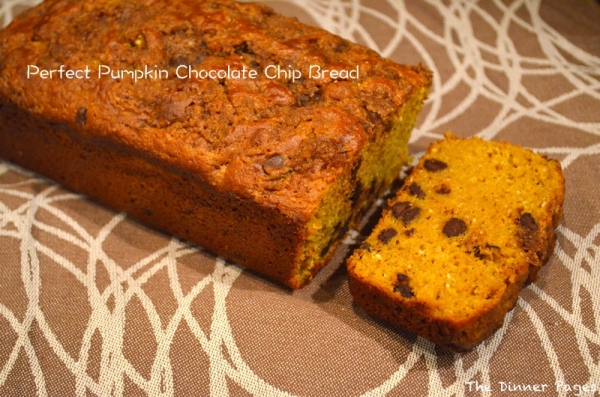
Perfect Pumpkin Chocolate Chip Bread

I know, I know, everything is pumpkin this time of year. But fall really is my favorite season and pumpkin plays a big role in that. Unfortunately we don’t have much of a New England style fall here in the southern US, and I greatly miss the gorgeous foliage and crisp fall air, but I can infuse some autumn atmosphere into my life with pumpkin goodness. And this Perfect Pumpkin Chocolate Chip Bread sure does bring goodness!

Perfect Pumpkin Chocolate Chip Bread

This is my first chance to join in with the “What’s Baking” group and the theme for the month was pumpkin. Can you tell I was disappointed? Ha. I was super excited because I absolutely love baking with pumpkin. I buy cans and cans of pumpkin puree each fall and try to test out a few new recipes each year. My first for this year was this pumpkin bread. I’ve made different pumpkin breads before but this one just takes the cake. This recipe is adapted from the Cook’s Illustrated Baking Book so I was pretty sure it was going to be a winner and it did not disappoint. The streusel topping to the bread lends a surprising and delightful texture and crunch. The cream cheese and buttermilk make this cake moist and counteract the sometimes metallic taste you can get from pumpkin baked goods after using canned pumpkin puree. Perfection!

Perfect Pumpkin Chocolate Chip Bread

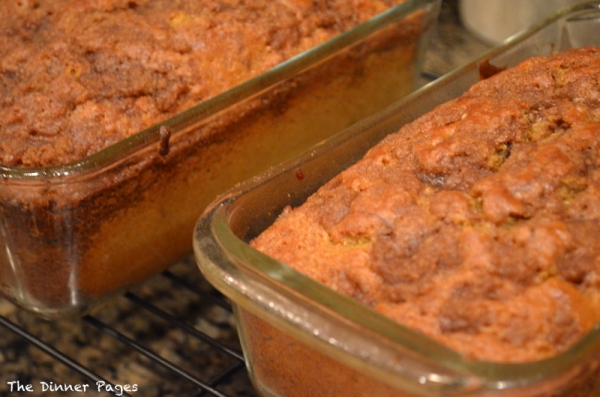
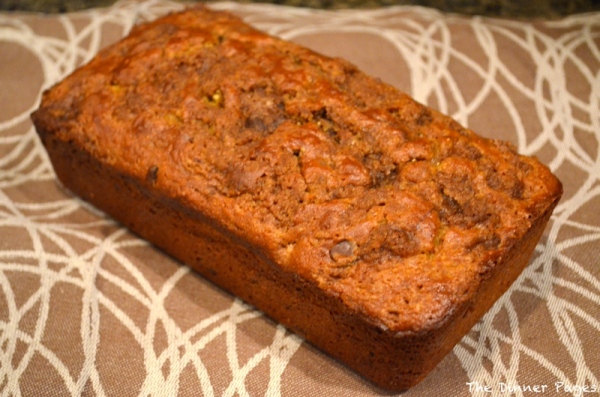
This recipe made two glorious loaves of pumpkin bread. I brought one to work and it was devoured rather quickly. Comments included “other worldly” and “two enthusiastic thumbs up.” Yes folks, I’m not making these reviews up. So you have got to try this recipe this pumpkin season. And I sure do hope to share some more pumpkin treats with you…if my colleagues don’t eat them all before I get photos!

Perfect Pumpkin Chocolate Chip Bread

______________________________

Perfect Pumpkin Chocolate Chip Bread (adapted from Cook’s Illustrated Baking Book)

Yield: 2 loaves

For the topping:

5 tablespoons packed light brown sugar

1 tablespoon all-purpose flour

1 tablespoon unsalted butter, at room temperature

1 teaspoon ground cinnamon

1/8 teaspoon salt

For the bread:

Nonstick cooking spray

2 cups all-purpose flour

1 ½ teaspoons baking powder

½ teaspoon baking soda

1 15 ounce can unsweetened pumpkin puree

1 teaspoon salt

1 ½ teaspoons ground cinnamon

¼ teaspoon ground nutmeg

1/8 teaspoon ground cloves

1/8 teaspoon ground allspice

4 ounces cream cheese (low-fat works fine), cut into 12 pieces

1 cup granulated sugar

1 cup packed light brown sugar

½ cup vegetable oil

4 large eggs

¼ cup buttermilk

1 cup semi-sweet chocolate chips

Directions:

  1. Combine all the ingredients for the topping in a small bowl. Work together with your fingers until the consistency is like coarse sand. Set aside.
  2. Preheat the oven to 350F. Prepare 2 loaf pans (9×5-inch) with nonstick spray.
  3. Combine flour, baking powder, and baking soda in bowl and set aside.
  4. In a large saucepan, combine the pumpkin puree, salt, cinnamon, nutmeg, cloves, and allspice and cook over medium heat, stirring frequently, until the mixture has thickened and reduced, about 10 minutes. Remove from heat and stir in the cream cheese, sugars, and oil. Stir slightly to start the cream cheese melting, then let sit for 5 minutes.
  5. Beat the eggs and buttermilk together in a bowl, then stir into the pumpkin mixture. Fold the dry ingredients into the pumpkin mixture and whisk until all the ingredients are combined and the consistency is homogenous.
  6. Stir in the chocolate chips.
  7. Divide the batter between the 2 prepared loaf pans. Sprinkle the topping over each loaf.
  8. Bake until a knife inserted into the center comes out clean (may have some melted chocolate), about 45-50 minutes. Let cool in the pan for 20 minutes, then remove from the pan and let cool for another hour.

______________________________

If you love pumpkin like I do, find more pumpkin recipes on the Dinner Pages! Happy fall!


What's Baking Badge

Apple Streusel Coffee Cake (Wild Huckleberry Streusel Sunday Coffee Cake)

homebaker1

As my readers know, I participate in the Home Bakers group (when time allows) and we are cooking our way through the book Coffee Cakes, with a different blogger hosting each month. Well this month it’s my turn to host, so I am excited to share with you the recipe of the month, Wild Huckleberry-Streusel Sunday Coffee Cake.

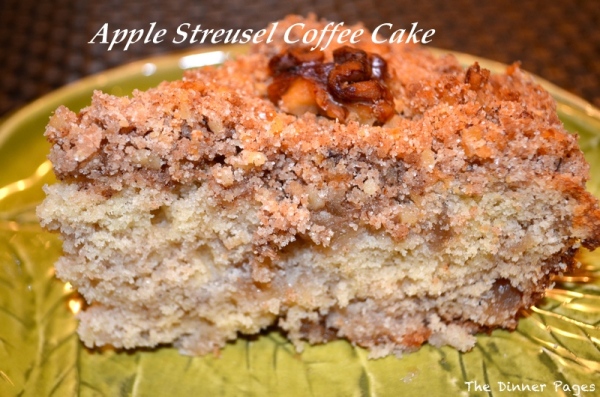
Apple Streusel Coffee Cake

So why, might you ask, is this recipe titled Apple Streusel Coffee Cake? Easy answer. I have no idea where to find a huckleberry around here and honestly it’s the fall and blueberries and raspberries just aren’t really in season anymore and apples are delicious and abundant. I modified the original recipe to allow for apples, but I’ll share the original recipe here too in case you happen to have a supply of huckleberries.

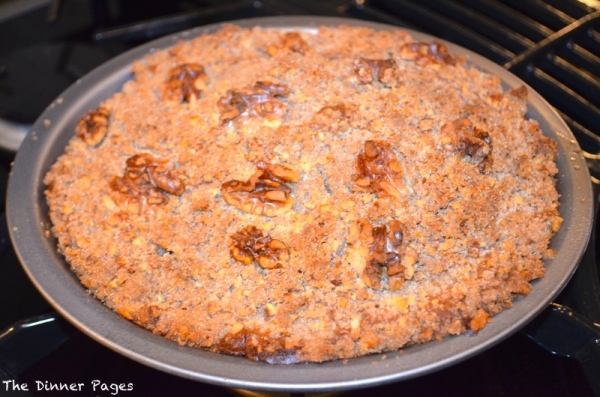
Apple Streusel Coffee Cake

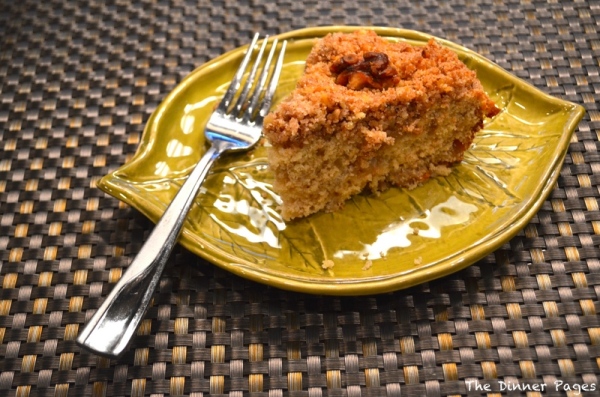
Regardless of the fruit, this cake is really amazing! The cake is moist and light and contrasts beautifully with the crunchy streusel topping. I brought it into to work for another brunch potluck and it was gone before lunch! And my family was quite jealous that I baked such a delicious cake to bring to work instead of share with them.

The main difference between the original recipe and my apple version was that I actually cooked the apples before adding to the batter which isn’t necessary for berries. I just wanted to make sure the apples wouldn’t be too crisp after baking. If you enjoy sauteed apples, that part of the recipe stands alone perfectly. You can adjust the spices a bit and serve it as a side dish or dessert.

Apple Streusel Coffee Cake

Feel free to check out everyone else’s interpretations of this recipe at the Home Bakers site. And don’t forget to come back to The Dinner Pages soon for another delightful fall recipe to add to your repertoire.

______________________________

Wild Huckleberry-Streusel Sunday Coffee Cake (adapted from Coffee Cakes)

Yield: one 9-inch round cake (serves 8)

For the cake

nonstick cooking spray

4 tablespoons (1/2 stick) unsalted butter, softened

6 tablespoons granulated sugar

1 large egg

1 teaspoon vanilla extract

2 teaspoons grated orange zest

1 cup unbleached all-purpose flour

1/2 teaspoon baking powder

1/2 teaspoon baking soda

1/4 teaspoon salt

1/3 cup buttermilk

1 1/2 cups fresh wild huckleberries, blueberries, blackberries, boysenberries, loganberries, raspberries, red currants, or pitted sour cherries

For the streusel topping

1/4 cup unbleached all-purpose flour

2 tablespoons cold unsalted butter, cut into bits

1/4 cup sugar

1 teaspoon ground cinnamon

1/3 cup chopped pecans or walnuts, plus 10 pecan or walnut halves

Directions:

1. Preheat the oven to 350F. Spray a 9-inch pie pan with nonstick spray (or butter and flour the pan).

2. Cream together the butter and sugar in the bowl of an electric mixer until light and fluffy. Add the egg, vanilla, and orange zest and beat well.

3. In a medium bowl, combine the flour, baking powder, baking soda, and salt. Add the dry ingredients to the butter mixture, alternating with the buttermilk, in 3 additions, starting and ending with dry ingredients, and beat until combined. Stir in the berries. Pour the batter evenly into the prepared pie pan.

4. Combine the flour, butter, sugar, and cinnamon in a small bowl, the cut in the butter and crumble the mixture between your fingers until it looks like coarse sand, then stir in the chopped nuts. Sprinkle over the batter and top with the nut halves.

5. Bake for 40-45 minutes, until a knife inserted into the center comes out clean. Let cool in the pan for at least 10 minutes. Then cut into wedges and serve warm or at room temperature.

______________________________

Apple Streusel Coffee Cake (adapted from Coffee Cakes)

Yield: one 9-inch round cake (serves 8)

For the cake

nonstick cooking spray

8 tablespoons (1 stick) unsalted butter, softened, divided

2 large crisp apples (I used Jonagold)

1/4 cup light brown sugar, packed

1/4 teaspoon cinnamon

6 tablespoons granulated sugar

1 large egg

1 teaspoon vanilla extract

1 cup unbleached all-purpose flour

1/2 teaspoon baking powder

1/2 teaspoon baking soda

1/4 teaspoon salt

1/3 cup buttermilk

For the streusel topping

1/4 cup unbleached all-purpose flour

2 tablespoons cold unsalted butter, cut into bits

1/4 cup sugar

1 teaspoon ground cinnamon

1/3 cup chopped pecans or walnuts, plus 10 pecan or walnut halves

Directions:

1. Preheat the oven to 350F. Spray a 9-inch pie pan with nonstick spray (or butter and flour the pan).

2. Melt 4 tablespoons (1/2 stick) of the butter into a large deep skillet over medium heat. Then add the apples, coat with butter, turn the heat to low, then cover and cook for 10 minutes, stirring occasionally. After 10 minutes, add the brown sugar and cinnamon and raise the heat back to medium. Cook, stirring frequently, until the apples are tender and glazed, for about 10 minutes more. Let cool slightly.

3. Cream together the butter and sugar in the bowl of an electric mixer until light and fluffy. Add the egg and vanilla and beat well.

4. In a medium bowl, combine the flour, baking powder, baking soda, and salt. Add the dry ingredients to the butter mixture, alternating with the buttermilk, in 3 additions, starting and ending with dry ingredients, and beat until combined. Stir in the apples. Pour the batter evenly into the prepared pie pan.

5. Combine the flour, butter, sugar, and cinnamon in a small bowl, the cut in the butter and crumble the mixture between your fingers until it looks like coarse sand, then stir in the chopped nuts. Sprinkle over the batter and top with the nut halves.

6. Bake for 40-45 minutes, until a knife inserted into the center comes out clean. Let cool in the pan for at least 10 minutes. Then cut into wedges and serve warm or at room temperature.

______________________________

Read more about coffee cakes on The Dinner Pages…

Elmo Cake and Cookie Monster Cupcakes

My little boy turned TWO last week! To celebrate, we threw him a Sesame Street themed birthday party over the weekend. Since our house is totally not unpacked or visitor ready, we had the party at a local burger place where the kids had a fenced in astro-turfed yard to run around and I just had to provide dessert and decor. It was a fun time and I am pretty happy with how the Elmo and Cookie Monster treats turned out.

Cookie Monster cupcakes

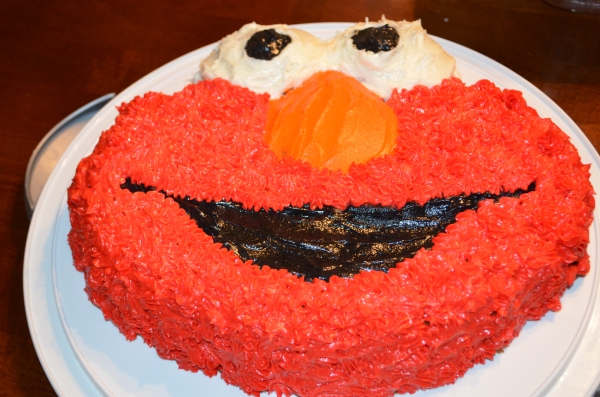
For the Elmo cake, I bought the pan at Michael’s. I whipped up a batch of the same Martha Stewart white cake I use for my son’s smash cake for his 1st birthday and made buttercream frosting, which I tinted black for Elmo’s pupils and mouth, orange for his nose, and red for his furry face. I used a spatula to apply all the frosting except for the red. For the red face I used a star tip from my cake decorating kit but the great thing about it was that the imperfections in my decorating ability looked just fine because Elmo is supposed to appear fuzzy and loved!
Elmo Cake

Preparations for the Cookie Monster cupcakes started a day earlier with a batch of chocolate chip cookies. I just followed the recipe on the bag of chips and I tried to slightly overbake them because I wanted crisper cookies for Cookie’s mouth. The cupcakes were Martha Stewart’s chocolate chip cupcakes and I used another batch of the same buttercream, this time tinted blue for Cookie Monster’s furry face, again decorating the face with the star tip. For his eyes I used white Wilton melts from Michael’s. I bought one of those edible markers for the pupils but it didn’t work on the melt. I should have bought black icing but I didn’t and since it was after Michael’s closed for the night, and I already had completed an emergency supermarket run for more butter after a measuring mishap, I used leftover black frosting from Elmo’s mouth, piped on with a small round cake decorating tip. Don’t forget that Cookie’s eyes are supposed to be googly and uneven! I thought they looked better applied to the cupcake at a slight slant instead of flat.

Cookie Monster Cupcakes

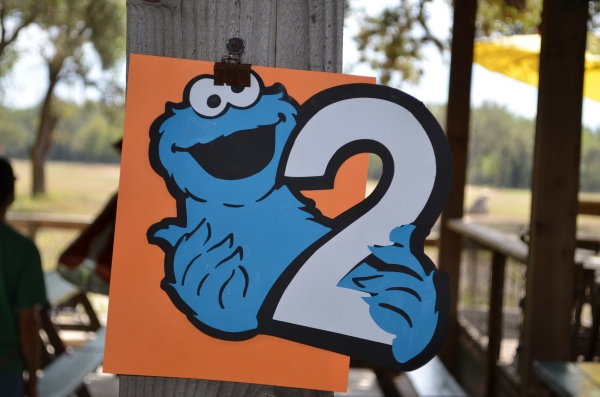
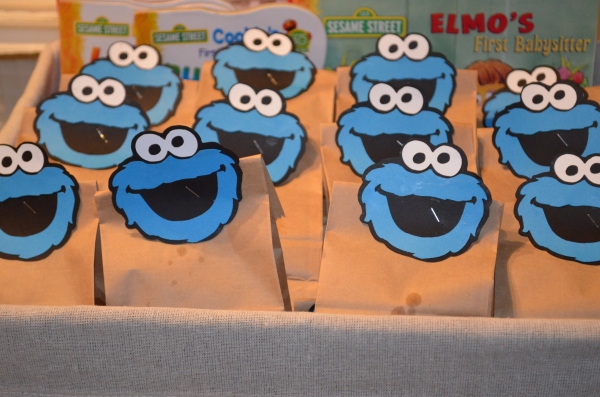
I didn’t get to do a ton of crafting for this party due to lack to time, but I’ll share the two things I did get to finish. First, I made a Cookie Monster holding a ‘2’ on the Cricut. Also, I made these cute little Cookie Monster faces with the Cricut (both from the Sesame Street fonts digital set) which I attached to a sack of cookies. I baked chocolate chip cookies, snickerdoodles, and honey cookies (recipe to follow soon) to fill up these favors. We also had Sesame Street books for the younger kids.
Cookie Monster sign


Cookie Monster favors

By the way, the white cake batter for the Elmo cake works great in other forms as well. I baked it into one of those big cupcake molds (a double recipe) last year for my son’s 1st birthday and it would be great baked into regular cake pans as well. It is such an easy cake to throw together that you definitely don’t need a mix!
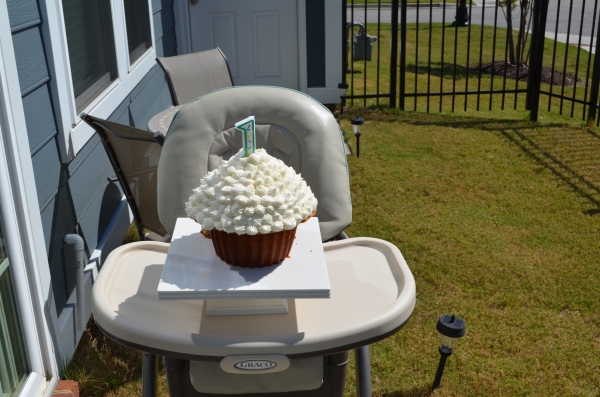
1st birthday cake

I found so many great Sesame Street party ideas on Pinterest, most of which will remain in my Pinterest folder unattempted, but I’ll be adding these pictures to the mix in the hopes I can help out other parents planning their child’s Sesame Street party. Hope these treats will bring “Sunny Days” and “sweep the clouds away.” Happy Birthday to my adorable son!

______________________________

Elmo Cake (adapted from Martha Stewart’s Cakes)

Yield: 1 Elmo cake (serves 12)

For the cake:

nonstick cooking spray (I used Baker’s Joy with flour)

1/2 cup (1 stick) softened unsalted butter

2 cups all-purpose flour

1 1/2 cups granulated sugar

3 eggs

1 tablespoon baking powder

1/2 teaspoon salt

1 cup skim milk

1 teaspoon vanilla extract

For the frosting:

1 1/2 cups (3 sticks) softened unsalted butter

1 pound (4 cups) confectioners’ sugar

1/2 teaspoon vanilla extract

Wilton Icing Colors in No-Taste Red, Orange, and Black

light corn syrup (optional)

Directions:

1. Preheat the oven to 350F. Coat the Elmo pan with nonstick spray (either one that includes flour or dust with flour).

2. Beat the butter and sugar together in the bowl of an electric mixer, then add the eggs and beat until combined. Add the flour, baking powder, and salt and beat until just combined. Then add the milk and vanilla and beat until smooth and homogenous.

3. Pour the batter until the Elmo pan and bake for approximately 35 minutes, until the cake is golden and a knife inserted into the center comes out clean. Let the cake cool in the pan for at least 20 minutes then carefully run a small spatula or knife around the edges, place a wire cooling rack against the cake and turn both the cooling rack and Elmo pan over. Carefully remove the pan. Now you’ll see Elmo’s face. Let the cake cool for at least 1 hour. Then carefully transfer to whatever dish you will be serving the cake on and slide 3 pieces of parchment under the edges to help with any frosting overflow while decorating.

4. Meanwhile, make the frosting by beating butter in the bowl of an electric mixer on medium-high speed until pale and creamy. Then reduce the speed to medium and slowly add in the confectioners’ sugar, a little at a time, increasing the speed to high for a few seconds every so often to help the frosting become light and airy. Then add the vanilla and beat until smooth.

5. Remove 1/2 cup of frosting from the bowl to a smaller bowl and add black tint until desired color is achieved. Then, if desired, add 1 1/2 teaspoons of corn syrup to help thin the frosting (also it helps make it glossy). Smooth the black frosting over Elmo’s mouth with an offset spatula (it’s okay to color out of the lines a little because you can cover it up with red frosting later). Make sure to save some black for Elmo’s eyes too.

6. Next frost his eyes with the white frosting, again smoothing it with the spatula. Make room for his pupils and pipe/smooth a circle of black frosting onto each eyeball.

7. For Elmo’s nose, set aside 1/4 cup of frosting and tint it orange until desired color is achieved. Then smooth the frosting onto his nose.

8. Finally, tint the remainder of the frosting red and thin, if desired, with 3/4 teaspoon light corn syrup. Either smooth it onto his face with a spatula or use a star tip (I used Wilton #21) to fill in the remaining unfrosted areas with red buttercream. Remove the parchment.

9. Make your child really happy!

______________________________

Cookie Monster Cupcakes (adapted from Martha Stewart’s Cupcakes)

Yield: 30 cupcakes

For the cupcakes:

3 1/4 cups plus 1 tablespoon cake flour, divided

4 1/2 teaspoons baking powder

1/4 teaspoon salt

1 tablespoon vanilla extract

1 cup plus 2 tablespoons skim milk

1/2 cup plus 6 tablespoons (1 3/4 sticks) softened unsalted butter

1 3/4 cups granulated sugar

5 large egg whites (I attempted to use the liquid egg whites first but they didn’t beat up nicely so I’d recommend using real eggs)

2 cups semi-sweet chocolate chips

For the decorations:

1 1/2 cups (3 sticks) softened unsalted butter

1 pound (4 cups) confectioners’ sugar

1/2 teaspoon vanilla extract

Wilton Icing Color in Royal Blue

Wilton Candy Melts (white)-1 bag

Black frosting (either leftover from Elmo cake or purchased separately. Alternately, set aside some of the frosting before tinting it blue and tint it black)

Chocolate chip cookie fragments (see recipe below)

Directions:

1. Preheat the oven to 350F. Line standard muffin tins with paper liners (blue if possible, for the ultimate Cookie Monster effect). Whisk together 3 1/4 cups cake flour, baking powder, and salt and set aside.

2. Cream butter in the bowl of an electric mixer on medium-high speed until smooth. Add the sugar and beat until pale and fluffy. Add the vanilla to the milk. Add the flour mixture in 3 batches, alternating with the milk mixture in 2 additions, beating after each addition. Set aside.

3. In another bowl, whisk the egg whites until stiff peaks form. Fold into the cake batter until just combined. Toss the chocolate chips with the remaining tablespoon of cake flour and gently fold into the cake batter.

4. Divide the batter among the cups, approximately 1/3 cup of batter in each. Bake for about 22 minutes, until a knife inserted into the center comes out clean and the tops of the cupcakes are springy to the touch. Let cool completely before frosting.

5. For the frosting, beat butter in the bowl of an electric mixer on medium-high speed until pale and creamy. Then reduce the speed to medium and slowly add in the confectioners’ sugar, a little at a time, increasing the speed to high for a few seconds every so often to help the frosting become light and airy. Then add the vanilla and beat until smooth. Finally, add the blue tint until you have achieved the desired hue. I had to hold a stuffed Cookie Monster up next to my mixing bowl until I got the color just right!

6. Once the cupcakes have cooled, either spread the frosting on top with an offset spatula or pipe on top with a star cake decorating tip (I used Wilton #21). Gently insert the Wilton candy melts in at an angle for his eyes. Pipe black frosting for the pupils (remember his eyes are uneven). Pop a piece of chocolate chip cookie in for his mouth and enjoy the cuteness!

_____________________________

Chocolate Chip Cookies

Yield: about 4 dozen cookies

3/4 cup (1 1/2 sticks) softened unsalted butter

1/2 cup granulated sugar

1 cup light brown sugar, packed

2 large eggs

1 tablespoon vanilla extract

1 teaspoon baking soda

1/2 teaspoon salt

2 cups all-purpose flour

2 cups semi-sweet chocolate chips

Directions:

1. Preheat the oven to 375F. Line cookie sheets with parchment paper or silicone mats (like Silpat).

2. In the bowl of an electric mixer, combine butter and the sugars and beat until smooth. Add eggs and vanilla and mix thoroughly. Add the dry ingredients and mix until fully incorporated. Add in the chocolate chips.

3. Drop by spoonfuls onto the cookie sheets. Bake for 12 minutes or until desired doneness. For Cookie Monster cookies, a little crispier is preferable.

4. Let cool on wire racks.

______________________________

Apple Basil Potato Kugel

CIC header

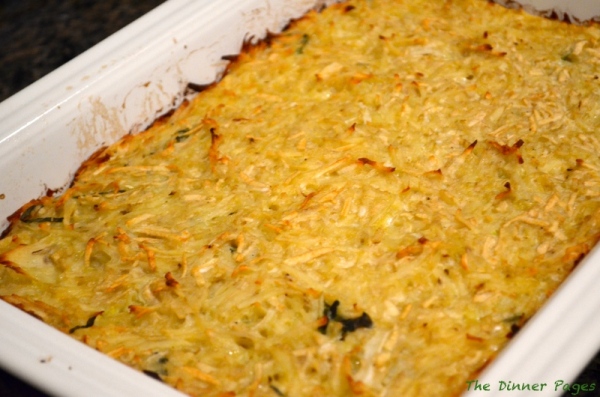
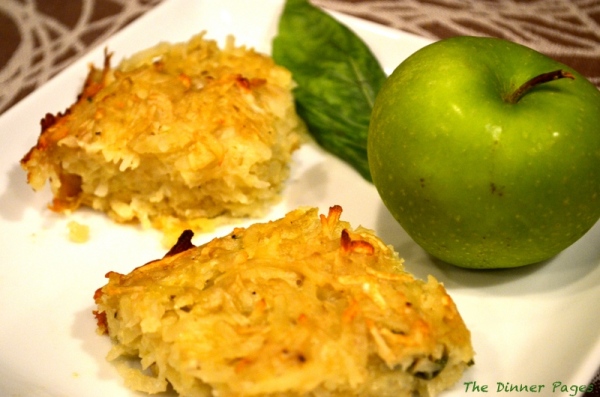
Next week marks the start of the Jewish year, Rosh Hashanah. Apples are a traditional part of the holiday because they represent a sweet start to the year (especially when dipped in honey) and hark back to the Garden of Eden. Kugels, which are a baked pudding or casserole, are a traditional Jewish food as well. In my family, we enjoy potato kugel at least one night of Rosh Hashanah. So when I was brainstorming for this month’s Crazy Ingredient Challenge, where I had to come up with a recipe melding apples and basil, I decided to put a twist on my typical potato kugel with the addition of apples and basil.

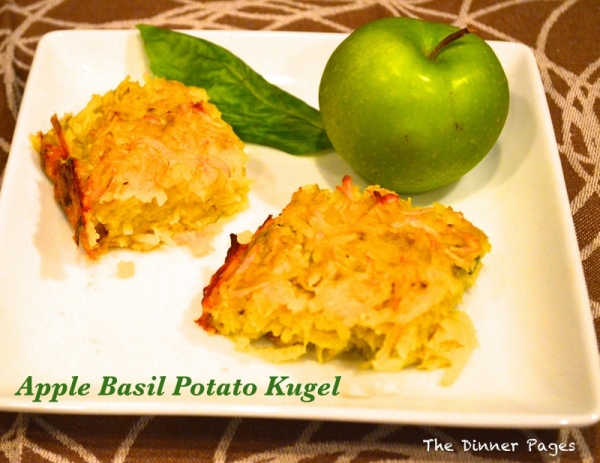
Apple Basil Potato Kugel

This kugel recipe was my grandmother’s, though when she typed it out (as she did with many of her recipes…clearly the apple doesn’t fall far from the tree…) she attributed it to Margaret’s niece. So, Margaret’s niece, if you’re reading this, thanks for the great recipe. We enjoy it every year!

Apple Basil Potato Kugel

I used to grate potatoes and onions by hand, but really, there’s no need to work that hard…or add a hint of blood to the dish. This time I used my Cuisinart food processor with the grating blade and saved a ton of time! I highly recommend using the food processor for the grating step if you have one available.

Swapping out a potato for an apple makes this kugel, which can be on the heavier side, a bit lighter in taste. The basil adds a unexpected burst of freshness as well. Try this kugel as a side dish for your holiday dinner, or any meal. L’Shana Tova (have a good year)!

Apple Basil Potato Kugel

______________________________
Apple Basil Potato Kugel

Yield: 12 servings

nonstick cooking spray

3 large russet potatoes

2 medium apples (I used gala)

1 onion

3 large eggs

1/3 cup all-purpose flour

1 1/2 teaspoons salt

1/8 teaspoon ground black pepper

4 tablespoons extra virgin olive oil

1/4 cup lightly packed basil chiffonade (basil sliced into thin strips)

Directions:

1. Preheat the oven to 350F. Coat an 9×13-inch baking dish with nonstick cooking spray.

2. Grate peeled potatoes, peeled and cored apples, and the onion into a bowl. Beat the eggs and add to the potato mixture, along with the flour, salt, pepper, olive oil, and basil.

3. Place in the baking dish and bake for at least 1 hour or until light brown and crisp.

______________________________

 

HunngryLittleGirl

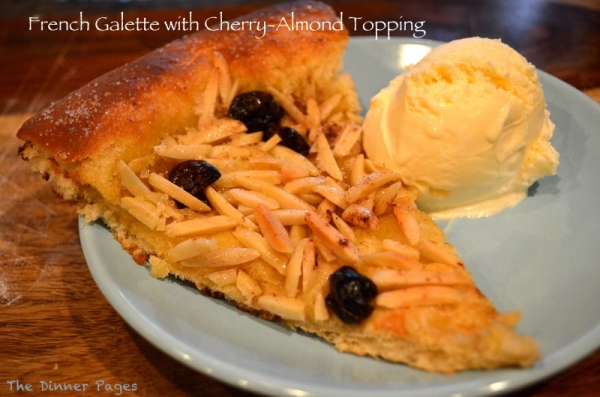
French Galette with Cherry-Almond Topping

homebaker1

Along with my break from blogging altogether, I also took a break from various bake-alongs this summer and I really missed the comraderie of baking something “together” from across the world! So since this next cake, French Galette with Cherry-Almond Topping, from The Home Bakers sounded tasty, I decided to give it a whirl and get back into the swing of things. It just so happened that I hosted an impromptu dinner for some friends on Labor Day and this treat made a perfect dessert to follow Chicken and Basil Stir Fry along with a Asian themed salad and rice.

So what is a galette? My au pair asked me that as I was preparing it. I always thought it was a free form flat pie or tart, which according to “the internet” is pretty much correct, though it can also be a bread or cake. Though this recipe was taken from the Coffee Cakes cookbook, I expected the crust was going to be a little more pie-like and less dough-like however actually, it came out perfect just as it was, though it’s more like a sweet pizza dough in texture and appearance than a pie or cake.

French Galette with Cherry-Almond Topping

I let yeast bloom in warm water with a pinch of sugar, then using the mixing blade of my stand mixer, I beat in margarine, sugar, an egg, vanilla, salt, and nutmeg. I used freshly grated nutmeg and it smelled amazing, though the regular ground nutmeg would work fine as well. Finally I beat in flour. The dough was a bit sticky and rough. The original recipe recommends placing the dough onto a floured board and kneading at that point, but to save time and clean-up, I switched from the mixing blade to the dough hook, and let it knead itself for a few minutes. The dough became much smoother and elastic and less sticky and then I turned it into a greased bowl, covered it with a towel, and let it rise for about an hour.

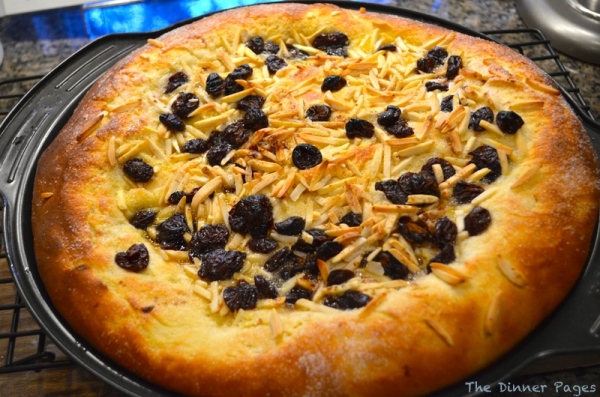
After it rose, I punched it down, kneaded it slightly with floured hands, and then formed it into a 12-inch round and fit it onto a greased pizza pan. Since a galette is supposed to be free form and somewhat rustic, I didn’t bother to roll it out with a rolling pin but rather stretched and shaped it into a round with my hands, trying to keep the thickness fairly even throughout.

Then I spread softened margarine over the entire surface, leaving a slight rim at the edges (a la pizza crust), then sprinkled sugar, dried cherries, and blanched almond slivers atop, along with a pinch of cinnamon. One thing I really appreciated about this recipe is that there are unlimited options for topping the dough. I just stuck with the recipe this time just to see how it worked but I guarantee that other fruits or types of nuts would be great. I am picturing an iteration with chocolate in my future. Yum!

After letting the topped dough sit for a little longer, I baked it at high heat for 6 minutes. The aroma was amazing–I felt like I was walking past the pretzel store at the mall with the buttery dough scent emerging from my oven and the cake was beautiful. The crust puffed up and became golden brown. Watch this step closely because it cooks really fast!

French Galette with Cherry-Almond Topping

I cut it up into pizza-style slices and served fresh from the oven with ice cream. This cake is not overly sweet and the cold ice cream was the perfect compliment to the warm cake. Enjoy!

______________________________
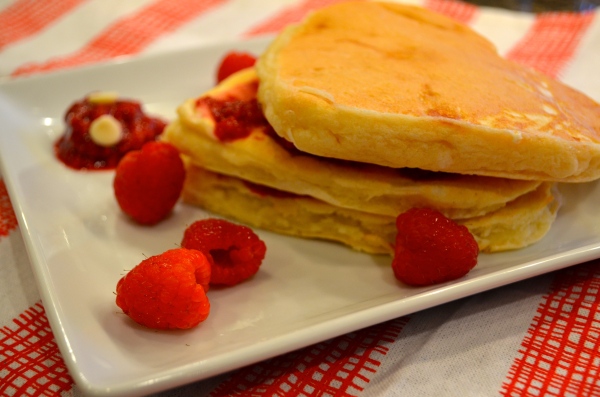
French Galette with Cherry-Almond Topping (adapted from Coffee Cakes)

Yield: one 12-inch flatbread (serves 6-8)

For the dough
1 package active dry yeast (2 1/4 teaspoons)

6 tablespoons warm water (105-115F)

pinch of sugar, plus 3 tablespoons

4 tablespoons (1/2 stick) unsalted margarine or butter (I used margarine to keep this dessert dairy free) at room temperature

1 large egg

1 teaspoon vanilla extract

1/4 teaspoon freshly grated or ground nutmeg

1/2 teaspoon salt

1 1/2 cups all-purpose flour

For the topping

2 tablespoons unsalted margarine or butter at room temperature

3 tablespoons sugar

1/2 cup dried cherries

1/2 cup slivered or sliced almonds (I used slivered blanched almonds)

pinch of cinnamon

Directions:

Please see Frozen Wings for the full directions for this recipe.

______________________________
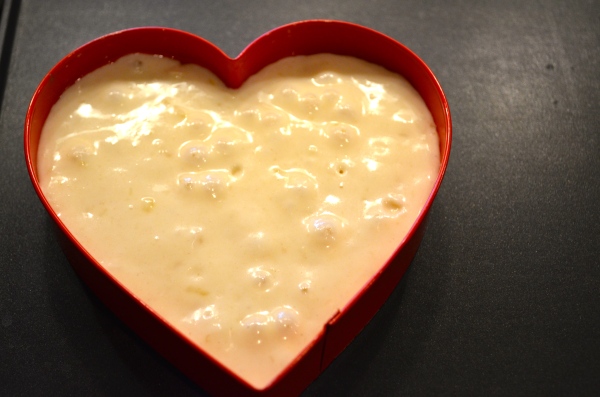
Check out The Home Bakers and see other interpretations of French Galette with Cherry-Almond Topping!

If you love “coffee cakes”, try my Milk Chocolate-Walnut Coffee Cake, Blueberry Stresel Coffee Cake, and Chocolate-Almond Souffle Cake.

Blueberry Streusel Coffee Cake

Welcome back to The Dinner Pages! Yes, my little blog has been very neglected lately. Let’s just say I have had a lot on my (dinner) plate…moving halfway across the country alone with a toddler, trying to sell one house and buy another, and starting a new job.

Most of my favorite cooking tools spent the summer on a moving truck, in storage, then on another truck and now are, little by little, finding my way into the cabinets in my new kitchen…there’s still one box containing my favorite cookbooks that’s unaccounted for and I hope the movers hid it in the masses of boxes in my garage because I’m going to be sad if I need to replace more than a dozen books that had lots of my personal annotations inside. The great thing is that thanks to this blog I have an inventory of my cookbooks easily at hand so I can definitely tell if something’s missing!

The other issue is that I don’t have internet at my new place just yet. I don’t know what is going on with AT&T right now but I’ve been waiting over a month and…nothing. Any thoughts on how to move them along?

So there’s my list of excuses why The Dinner Pages has been MIA. The good news is that my husband finally arrived and now I have a little bit more time (in between opening up and unpacking the 270 boxes and working full time) to cook and write about it! This summer has been rough but things are looking up now. 🙂

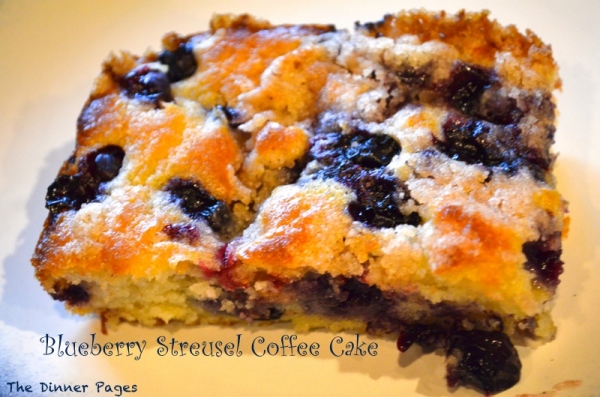
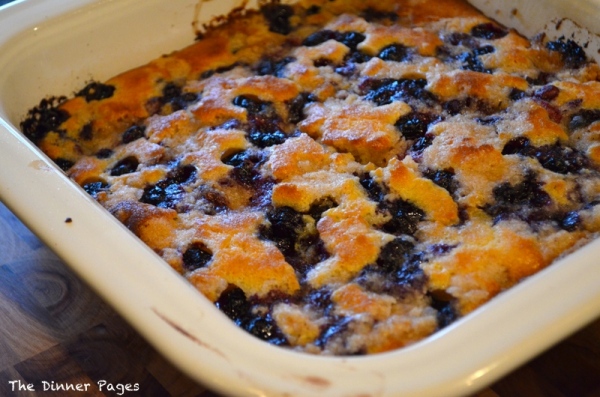
I really wanted to share one of my all-time favorite recipes with you before summer totally ends, Blueberry Streusel Coffee Cake. I grew up with my mom baking this cake each summer and I learned the recipe from her. Blueberry Streusel Coffee Cake is a sweet treat that I bake several times each summer. It’s easy and delicious and travels really well, so I find myself making it to bring to barbecues and work potlucks, as well as for my family. Despite my minimal access to cooking tools this summer, I still figured out how to make this cake twice while living in limbo. It disappeared from my work brunch in minutes. Yum. I also really love to refrigerate it and eat it chilled the next day. The crispy streusel topping is delicious with the cold blueberries.

Blueberry Streusel Coffee Cake

So welcome back to The Dinner Pages. Hopefully it won’t be so long before I share another delicious recipe with you. Despite my hiatus I’ve still been cooking from time to time and coming up with lots of ideas to share with you! Have a wonderful Labor Day Weekend and enjoy this bit of summer in a cake!

Blueberry Streusel Coffee Cake

______________________________
Blueberry Streusel Coffee Cake 

Yield: one 8-inch square cake

1 cup all-purpose flour

1 1/2 teaspoons baking powder

1/2 teaspoon salt

1/3 cup margarine or butter

1/3 cup sugar

1 egg

1/2 cup milk

1 tablespoon lemon juice

1 heaping cup fresh blueberries, washed

FOR TOPPING:

1/3 cup sugar

1/4 cup flour

1/8 teaspoon salt

1/4 teaspoon cinnamon

2 tablespoons margarine or butter

Directions:

1. Mix flour, baking powder, and salt together and set aside.

2. Cream margarine and sugar together. Add egg and beat well.

3. Add flour mixture alternately with milk, in 4 or 5 portions, beginning and ending with flour, beating thoroughly after each addition.

4. Turn into a well-greased 8-inch square cake pan. Add lemon juice to the blueberries. Scatter over batter.

5. Prepare streusel topping by combining sugar with flour, salt, and cinnamon. Add margarine and work together into a crumbly mixture. Sprinkle over top of blueberries.

6. Bake at 375F for 40 minutes.

______________________________